Step by Step Guide
Step 1:
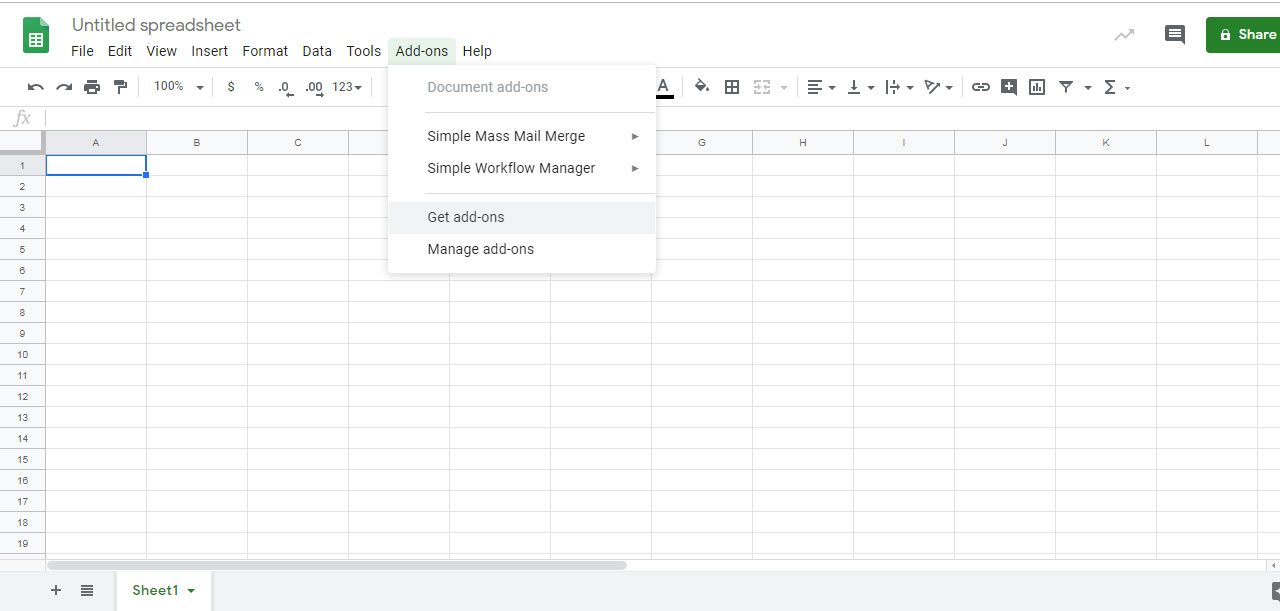
Go to Google Spreadsheet™, click on “Add-ons” in the menu then “Get add-ons” in the submenu.
Step 2:
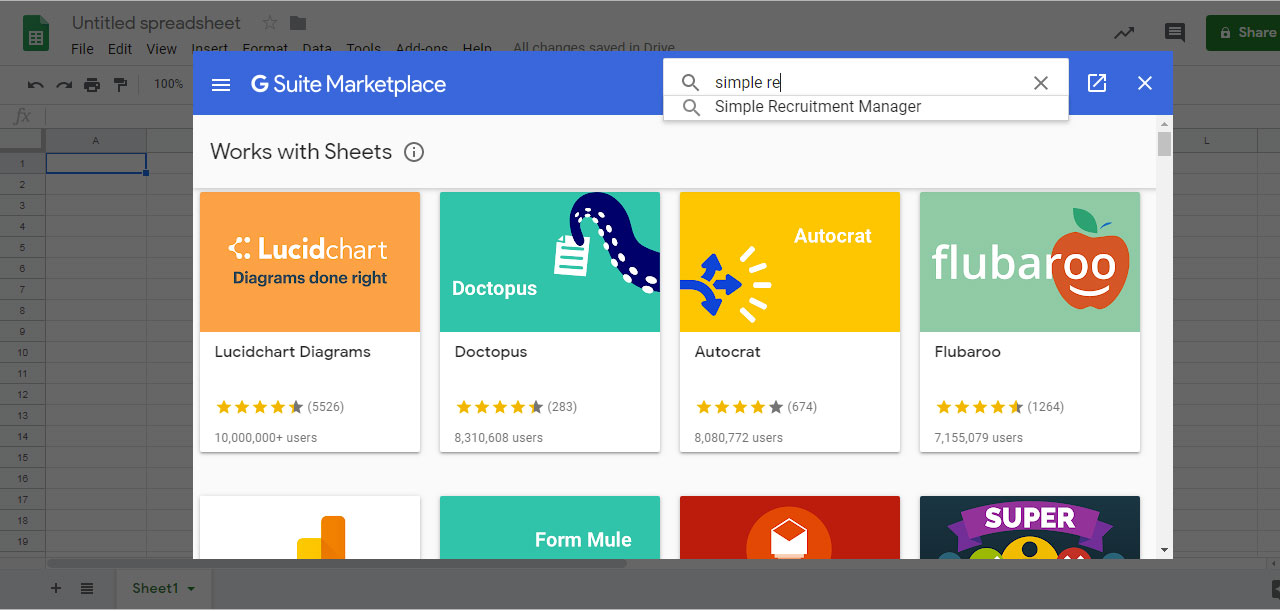
A popup will appear and click on search bar and write “Simple Recruitment Manager”. Press enter key.
Step 3:
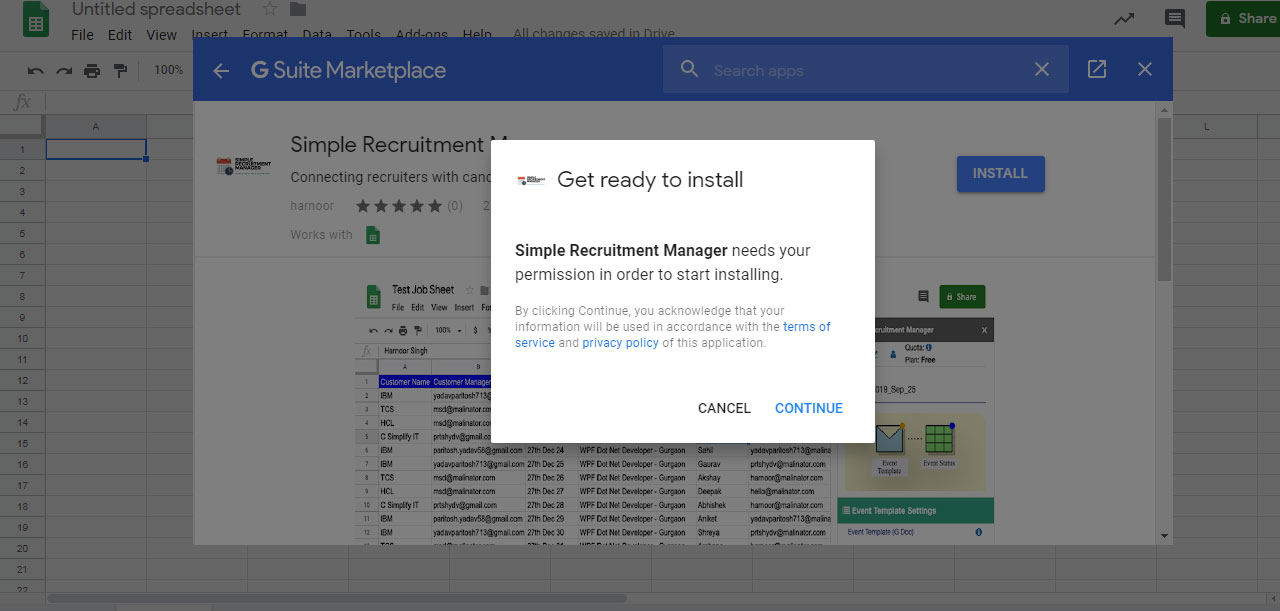
Your search has finished with Simple Recruitment Manager option. Just click on “Install” button.
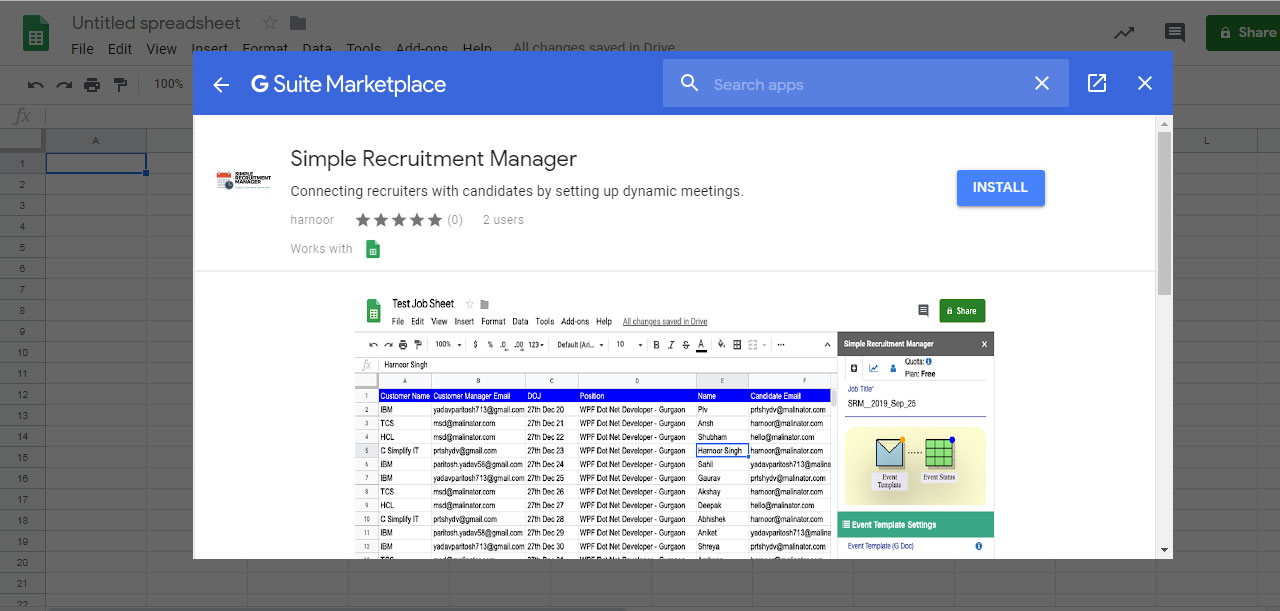
A popup will appear for the confirmation, click on “Continue” button to continue the installing process.
Step 4:
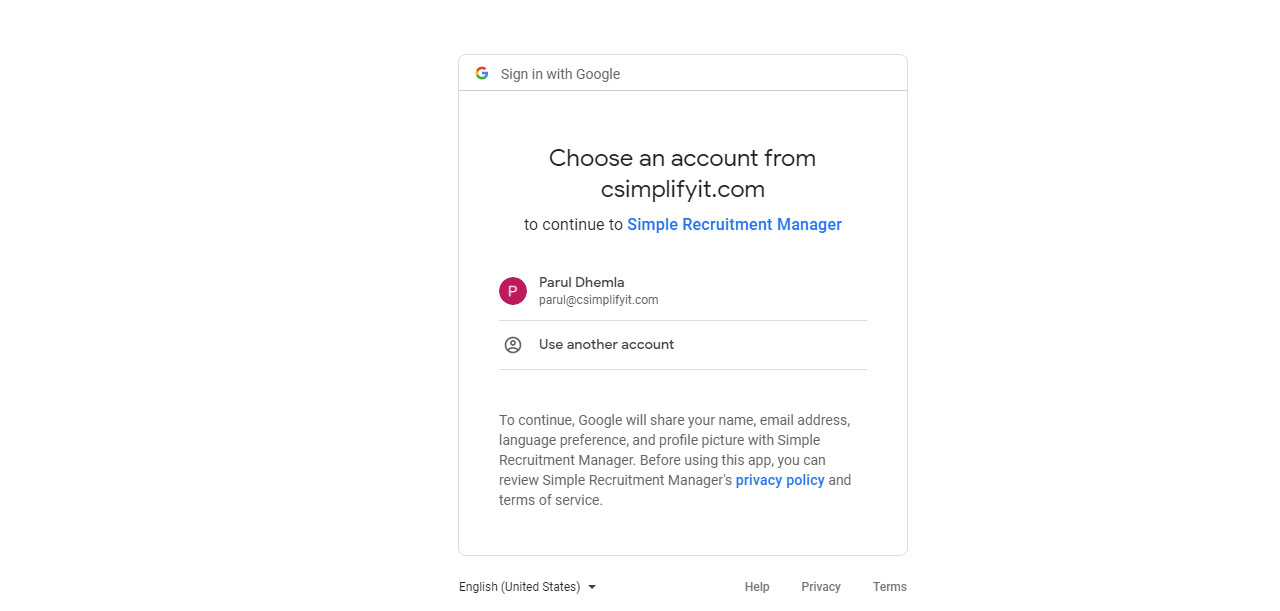
Another window will open with your Gmail accounts lists. You have to select any one account to proceed with.
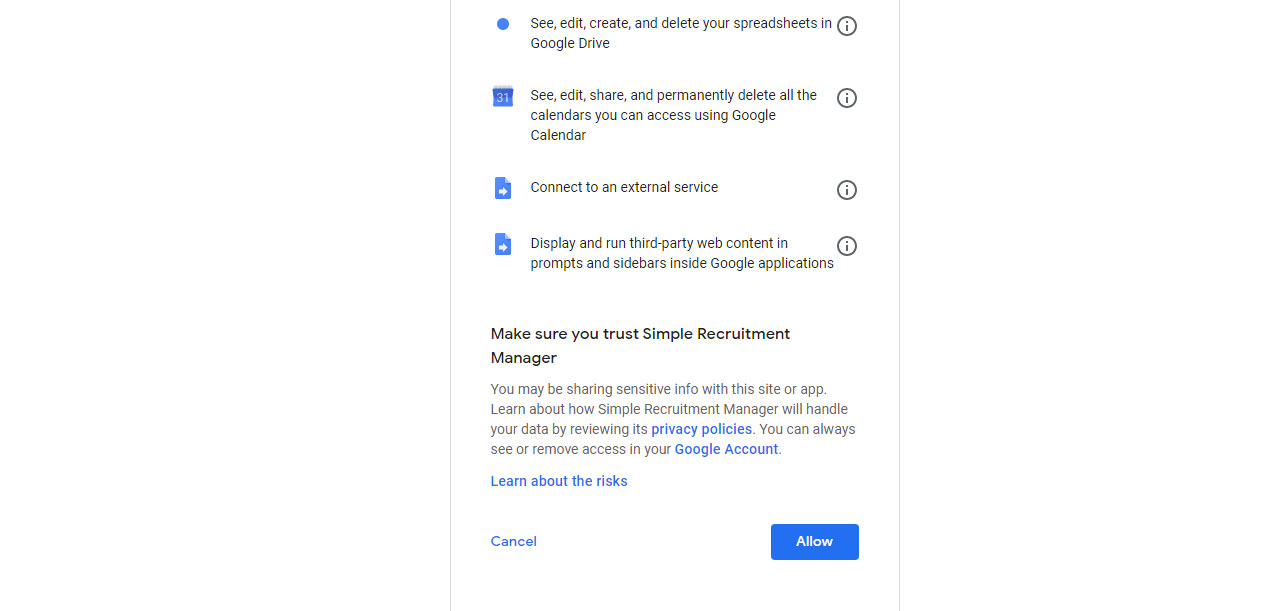
Then, another screen will appear with some terms – there you have to click on “Allow” button.
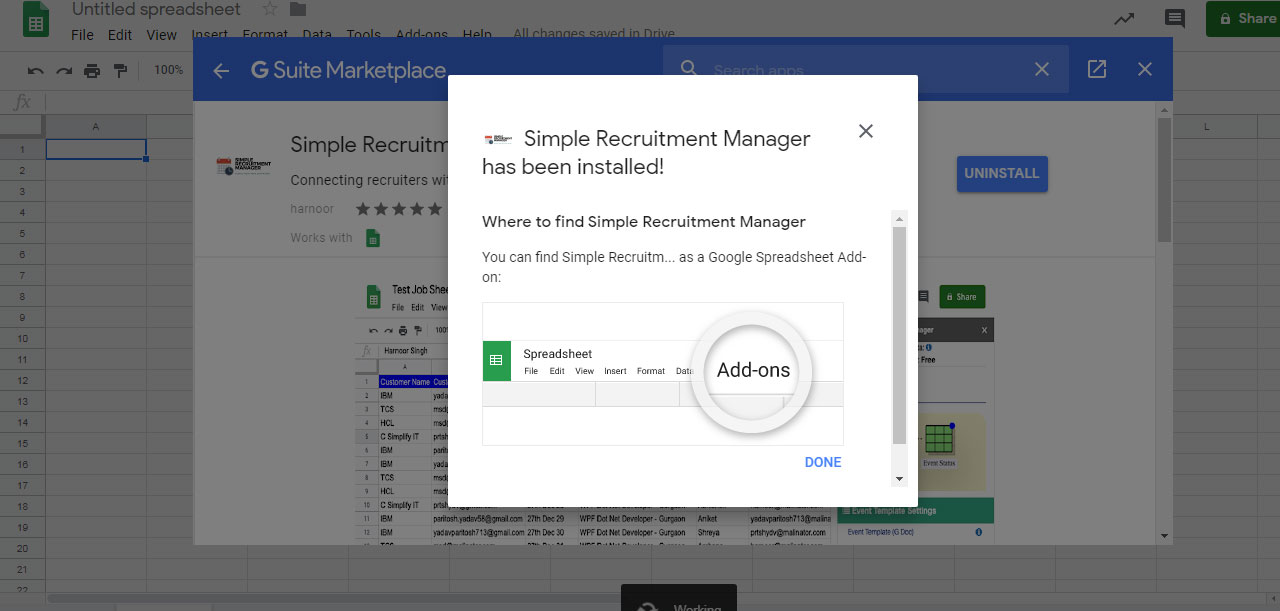
A popup will appear with the message that your app has been installed, click on “Done” button.
Step 5:
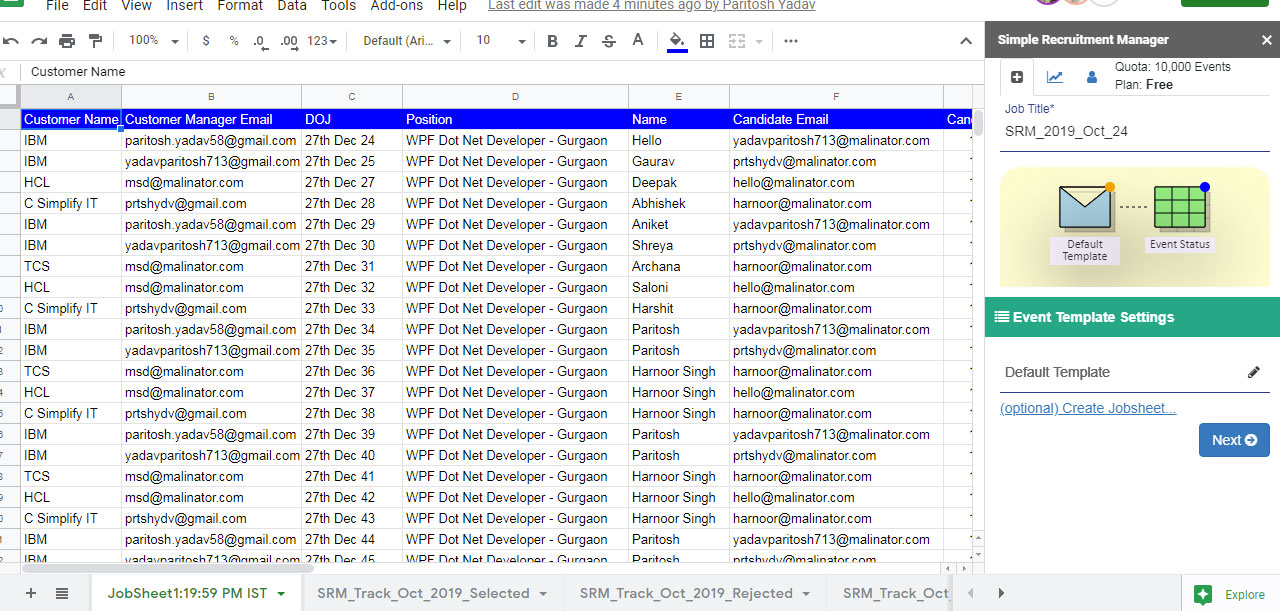
Go to the Google Spreadsheet™, click the Add-ons menu and you’ll see a new menu called Simple Recruitment Manager. Click on Configure Simple Recruitment Manager.
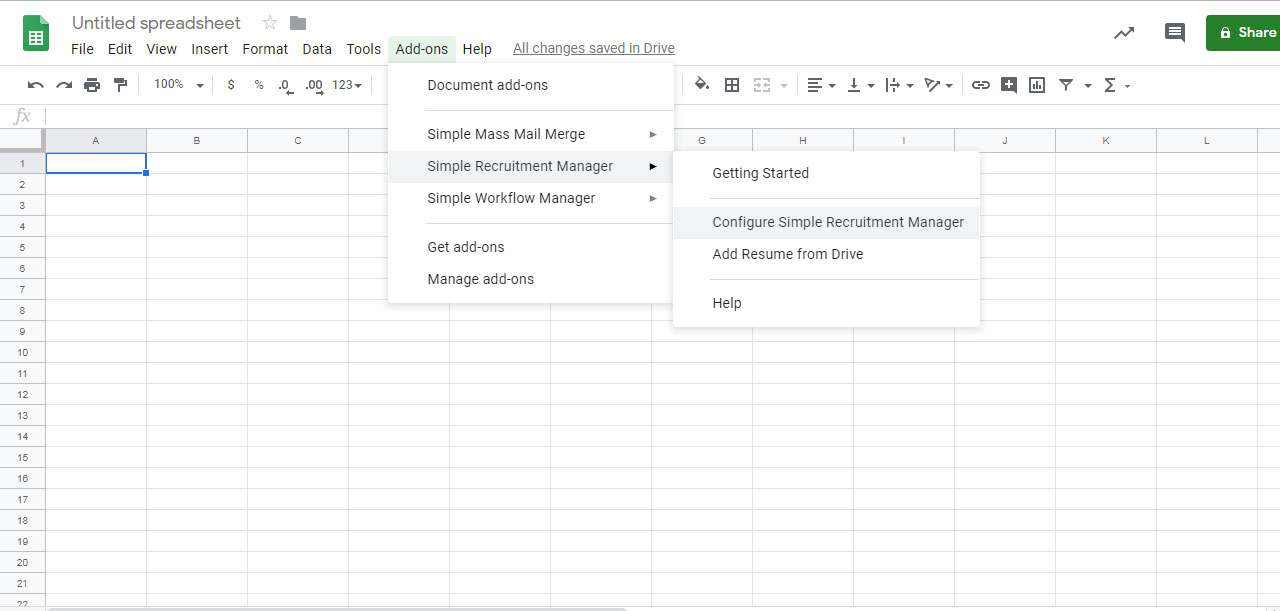
A popup will appear on the right side of the sheet. Prepare the source data, refer to “How to prepare data” mentioned below these steps.
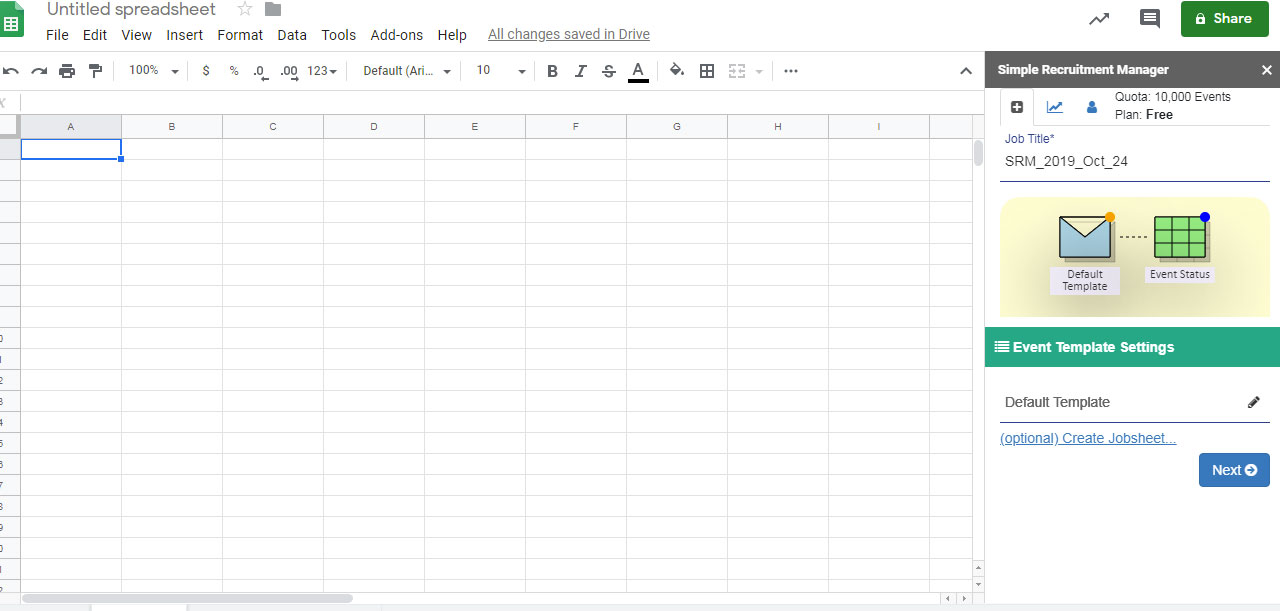
Step 6:
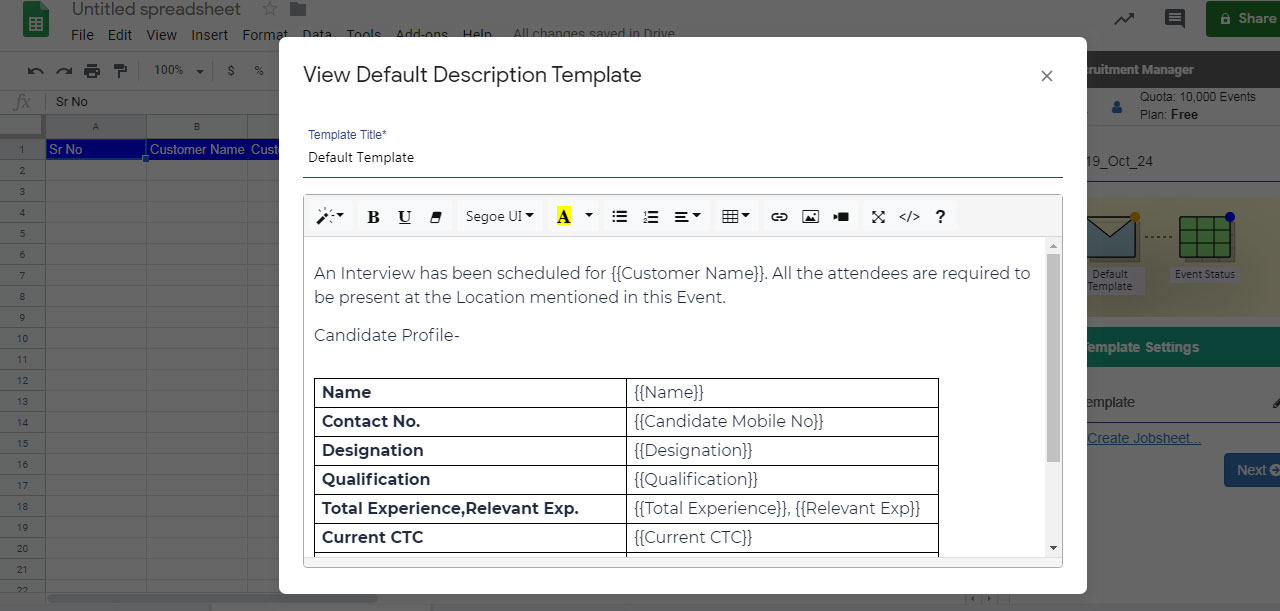
You can view "Default Template" by clicking on edit icon present in the "Event Template Settings".
After clicking on edit icon a popup will appear, there you can view description template.
You can make spreadsheet manually or you can click on “(Optional) Create Jobsheet…” link. It will create a new spreadsheet with the column names which helps you in recruitment process.
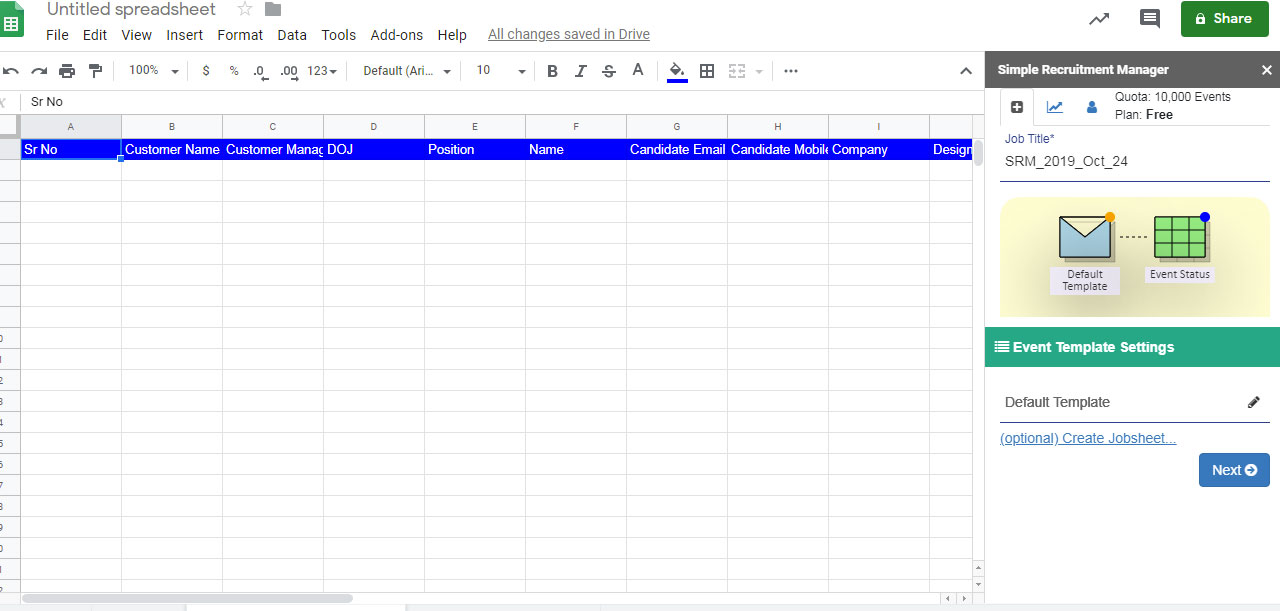
Fill the columns details accordingly.
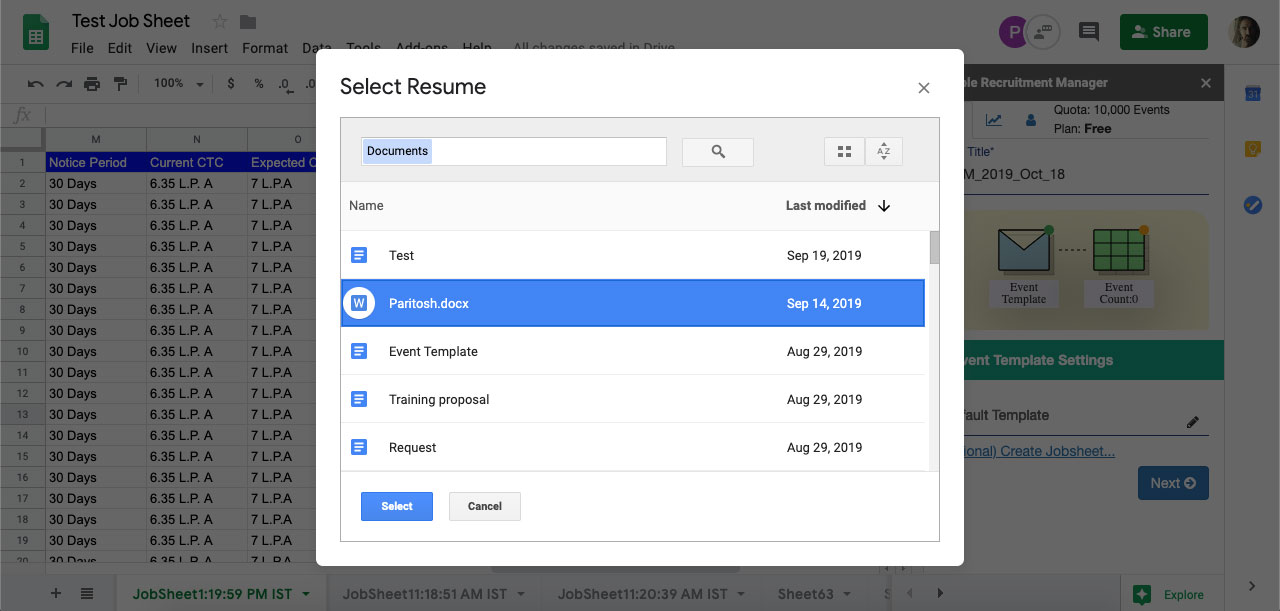
You can put resume link directly in the resume column, if it is saved in your drive. Click on particular column where you want to insert resume, then go to "Add-ons" then "Simple Recruitment Manager" then select "Add Resume from Drive" option.

A popup will appear, select resume which you want to upload. Then, click on "Select" button.
Step 7:
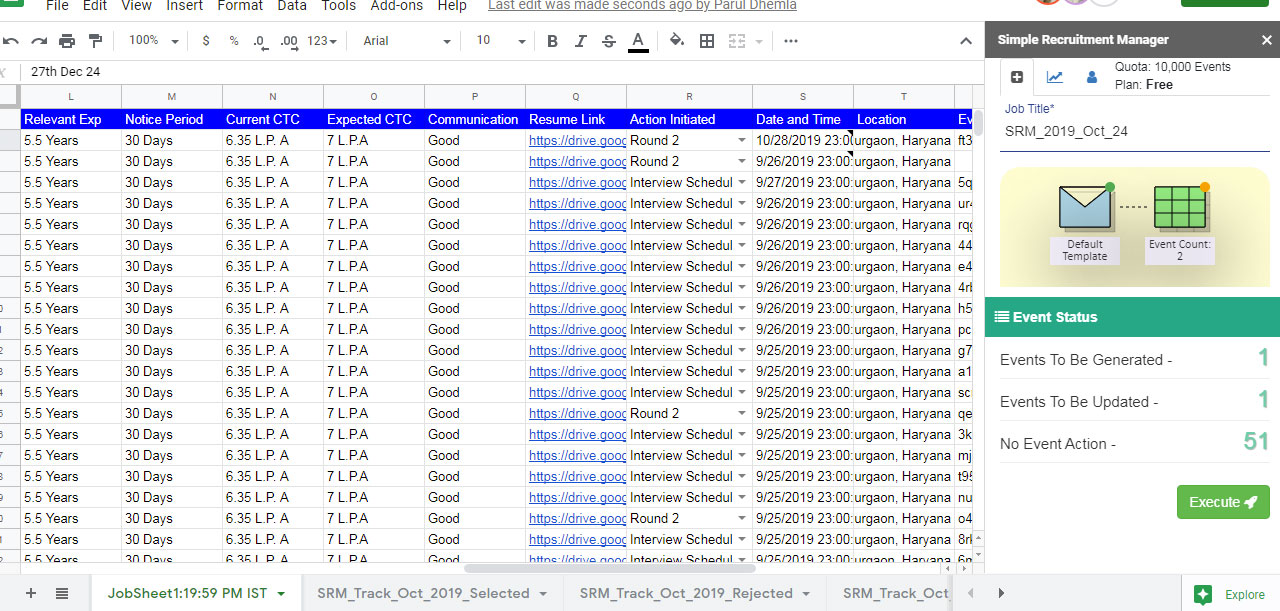
After crating the Jobsheet click on “Next” to move to the next screen to check the status of the events to be processed.
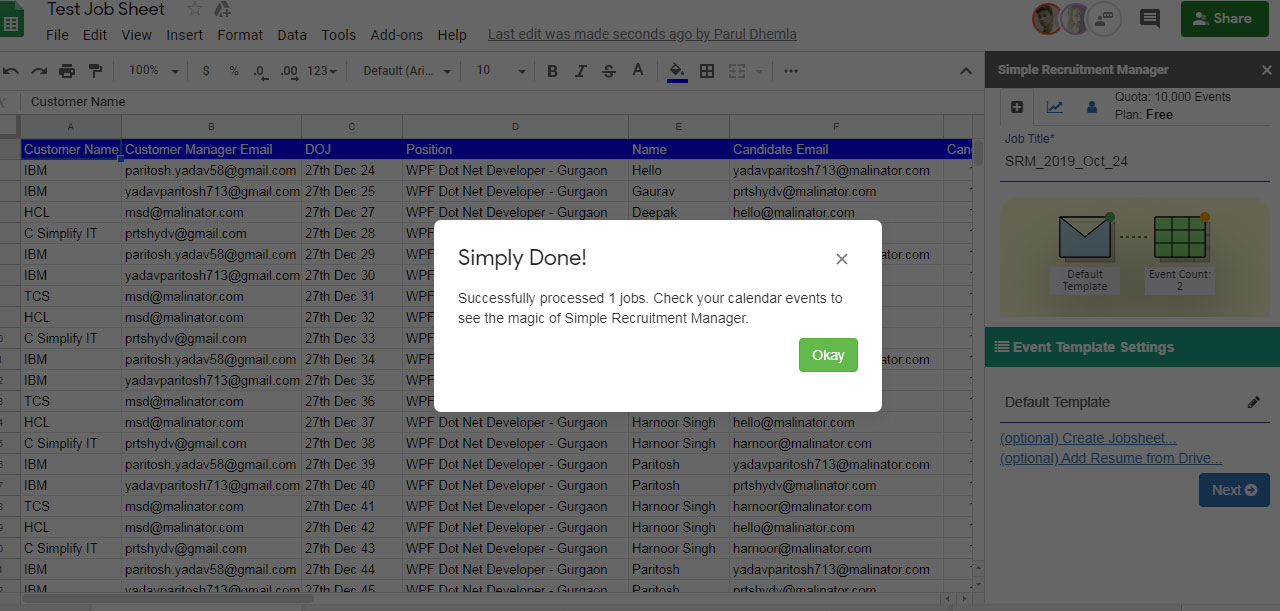
Step 8:
Click on "Execute" to execute the process.
A popup will appear to show whether its done or not. Then click on "Okay".