Initiate on Form Submission
"Initiate on Form Submission" is a type of trigger in which you will work on any existing google form™ of your account, for example - Leave apply form.
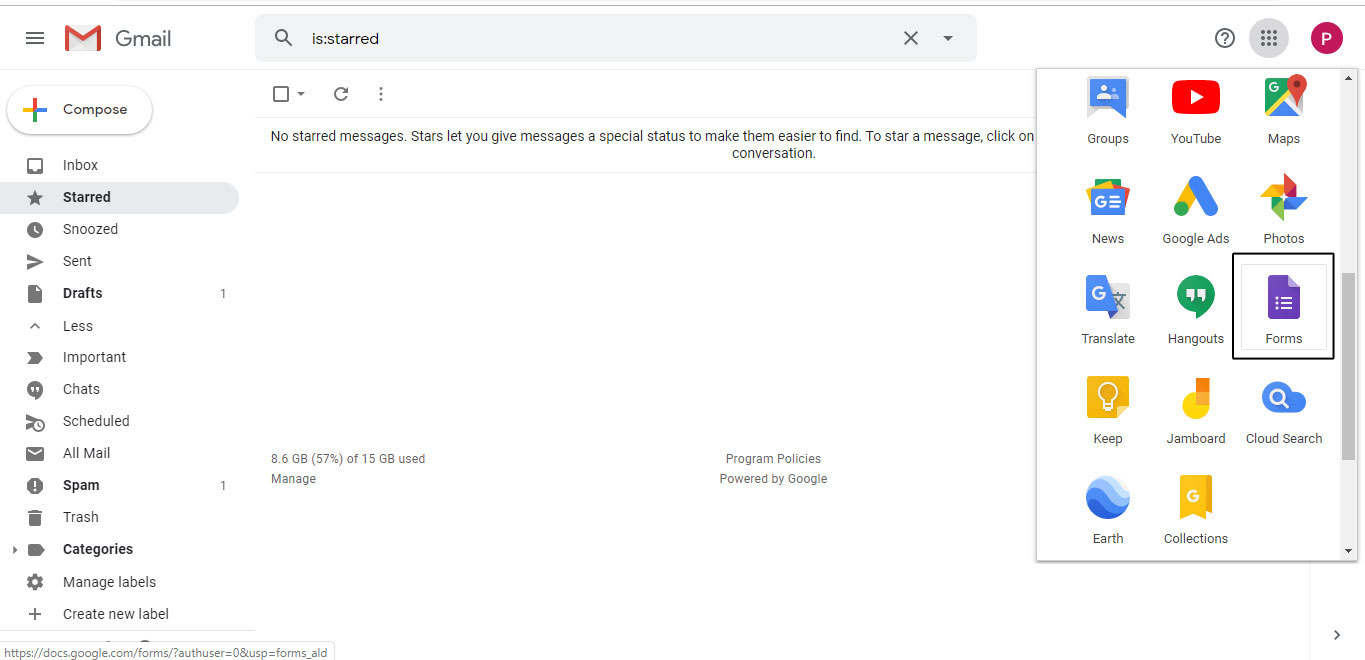
You can create form or use already existing form in your account. Login to your gmail account. Click on grid icon on the top right side of your gmail account. Then click on Forms.
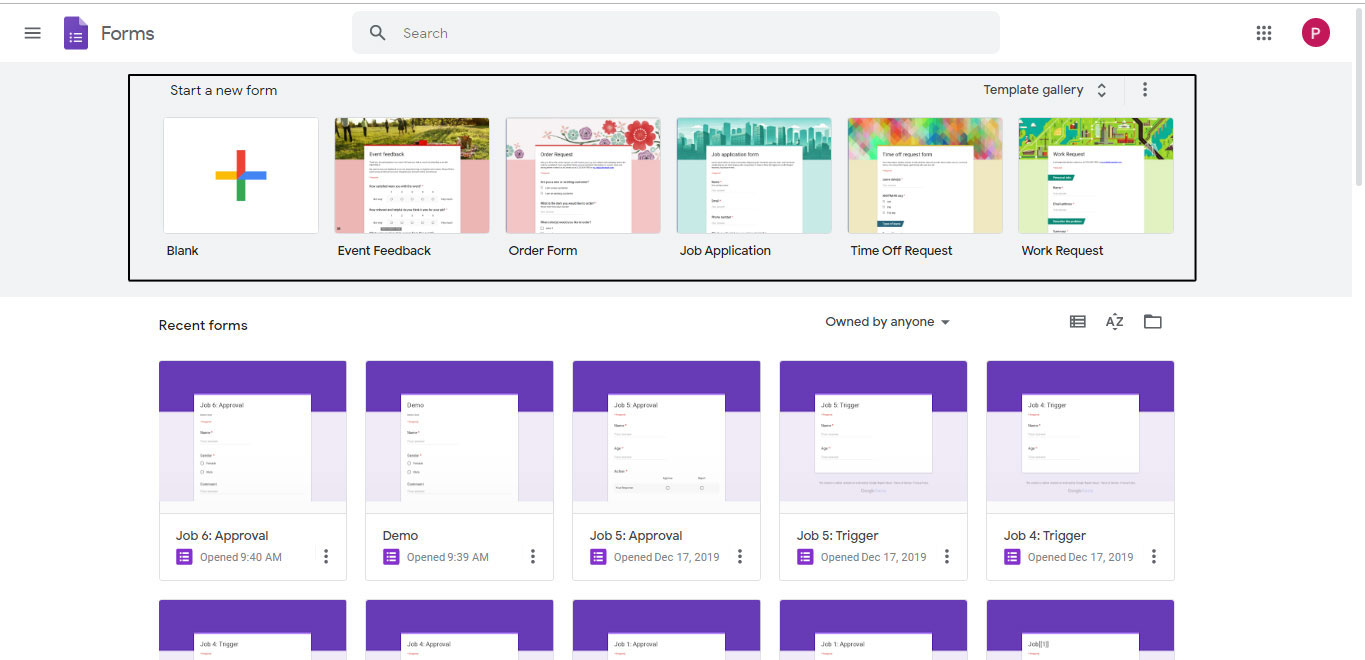
It will redirect you to docs.goggle.com/forms. Here, you can make form either by choosing Blank form to make it according toy your requirement, or you can choose any template for your reference.
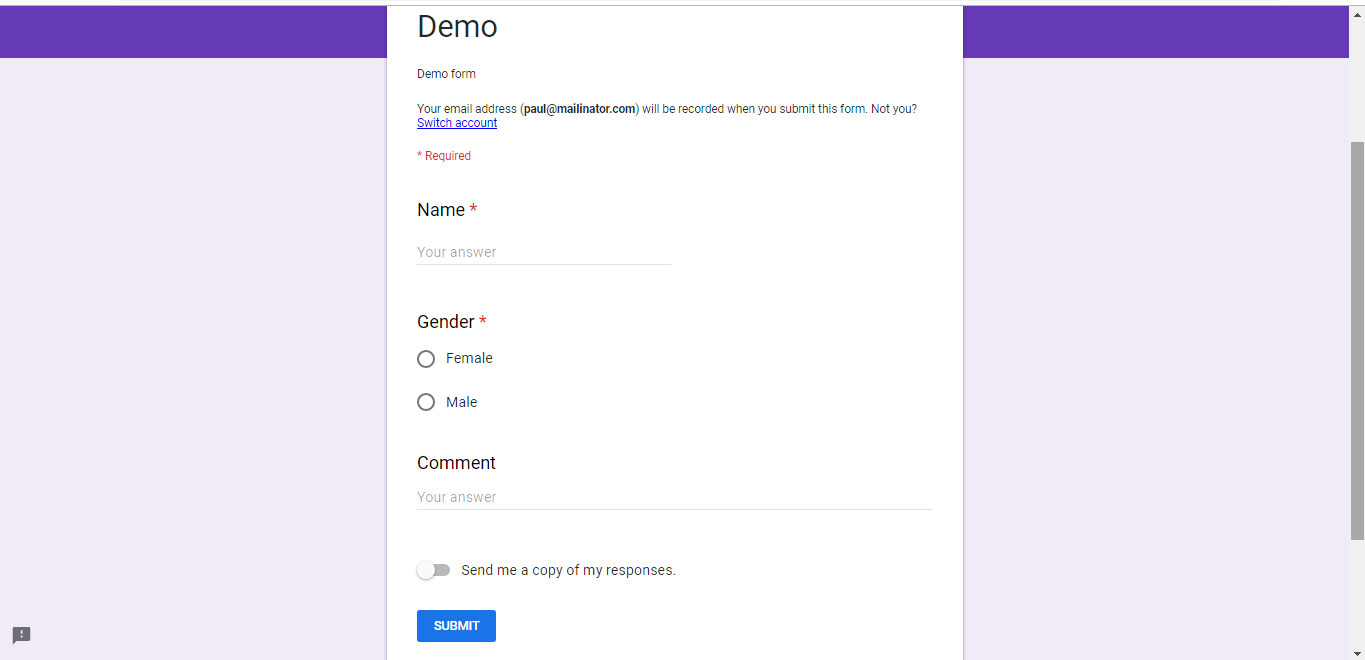
Suppose you click on Blank form to create it accordingly. You will find the you have all the options present there to name your form, add its description, add whatever type of question you want to add in your form.

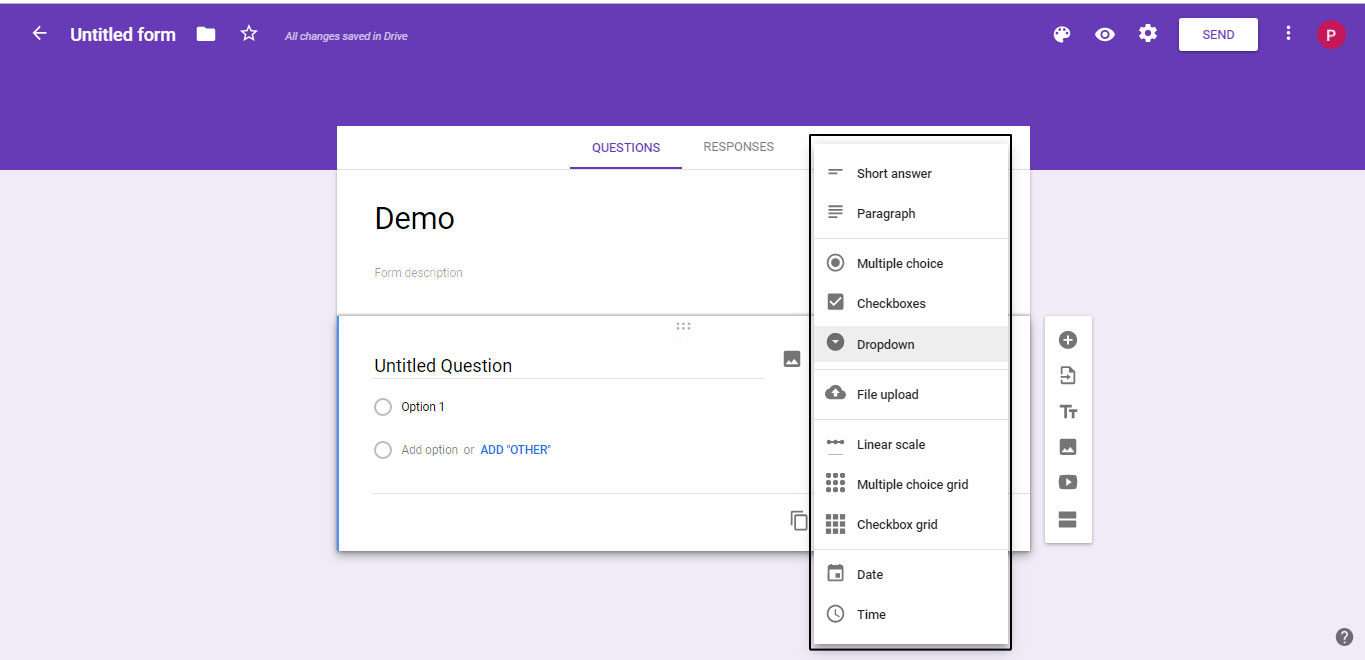
You can add as many questions you want with different input type. Click on + icon to add new question and click on Dropdown button which has default value "Multiple Choice".

By clicking on dropdown button you will find multiple input type. You can choose according to your need.
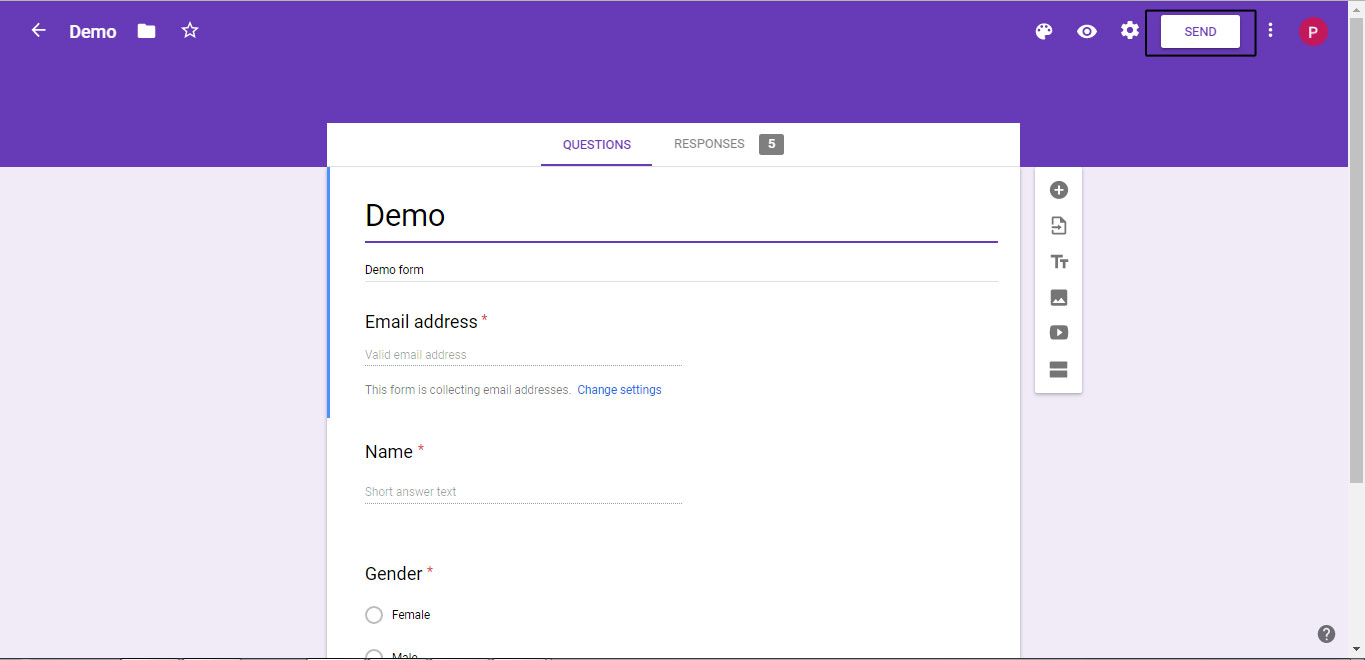
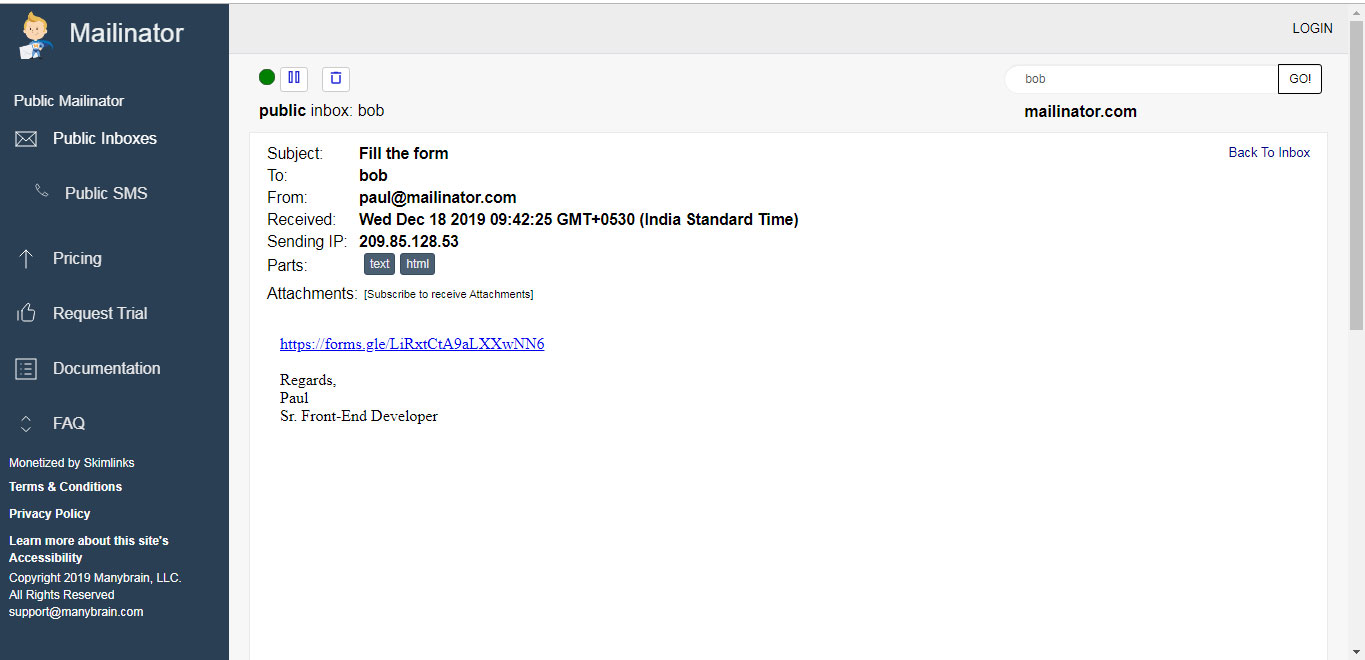
You have to send the form link manually to each participant whom you want it to fill. Click on Send button present on the top right of the page.
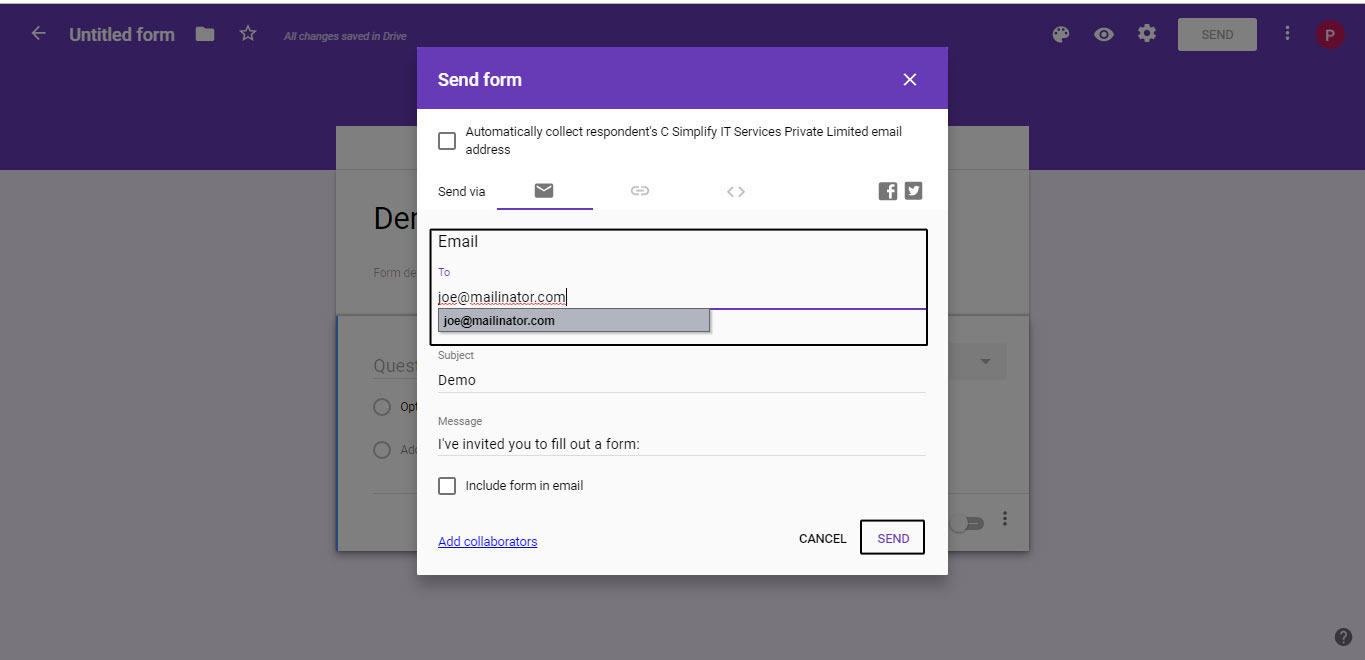
A popup has been displayed where you can fill the email id of the participant whom you want to send the form directly.
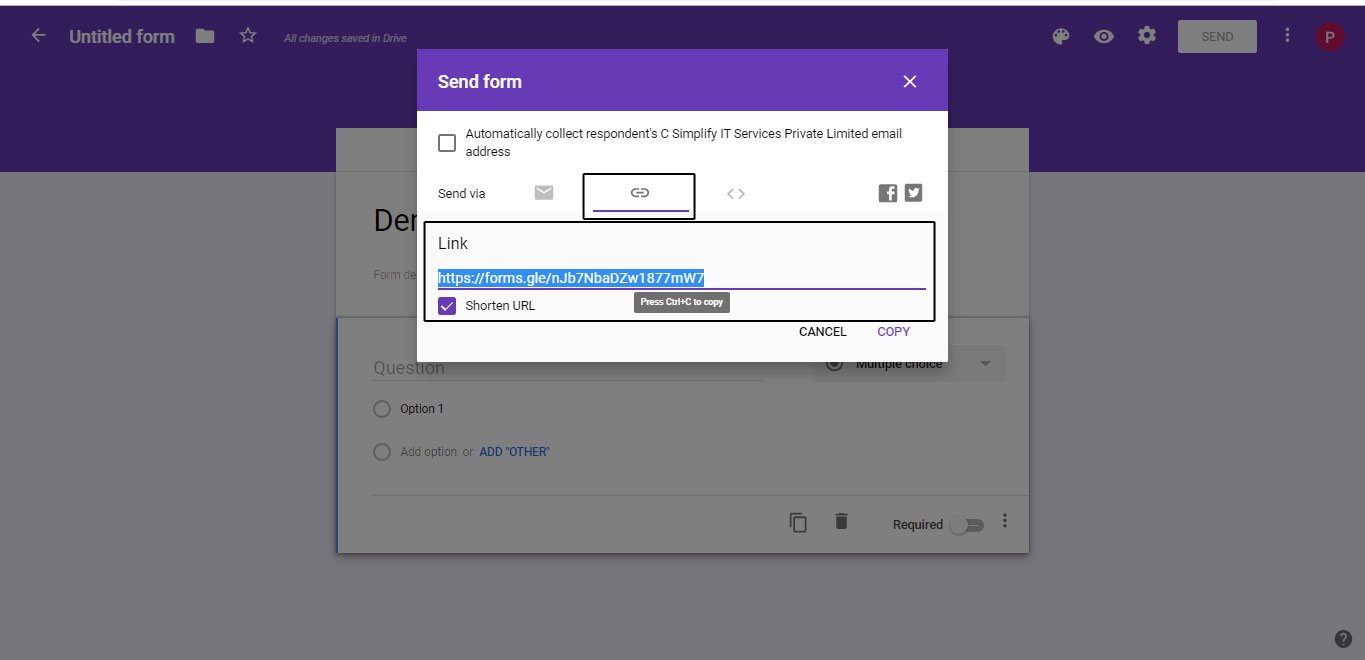
Or you can click on attachment icon or embeded icon to find the link of the form to send it on any social media or account.
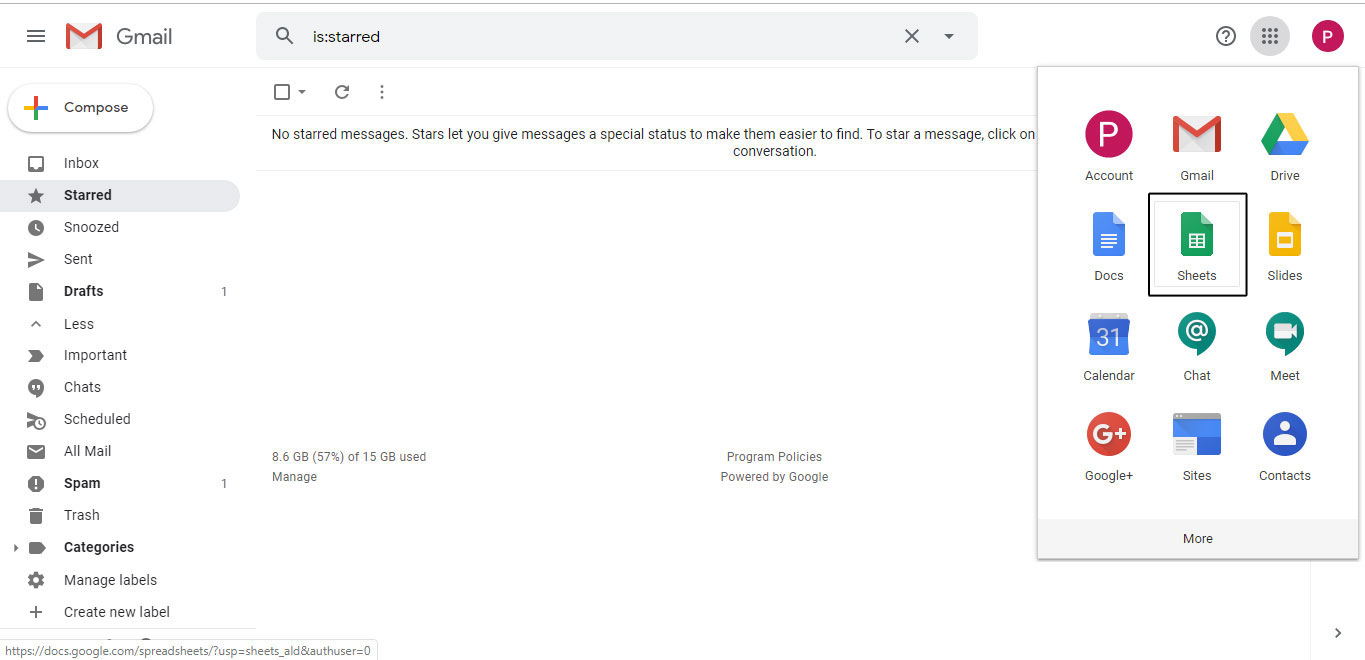
Now back to our product. Again, go to your gmail account. Click on grid icon present on the top right of your gmail account. Then click on Sheets.
Follow Step 1 - Step 5 of "Step by Step Guide" tab.
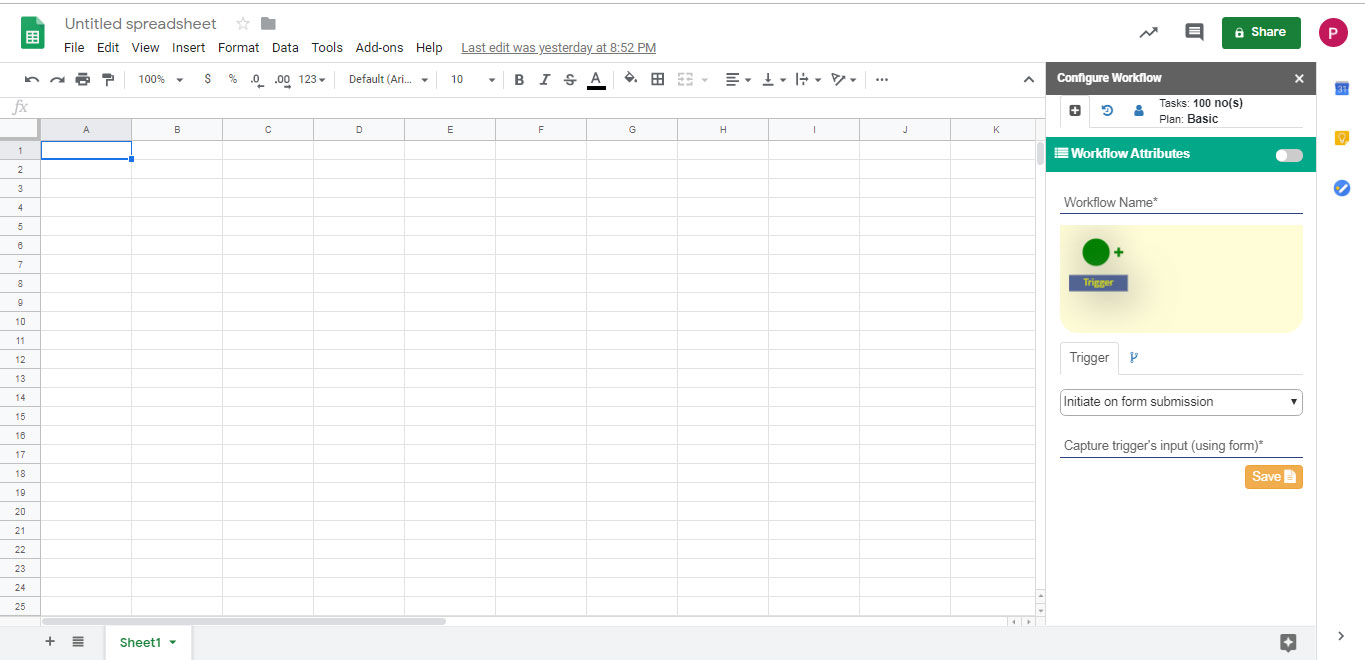
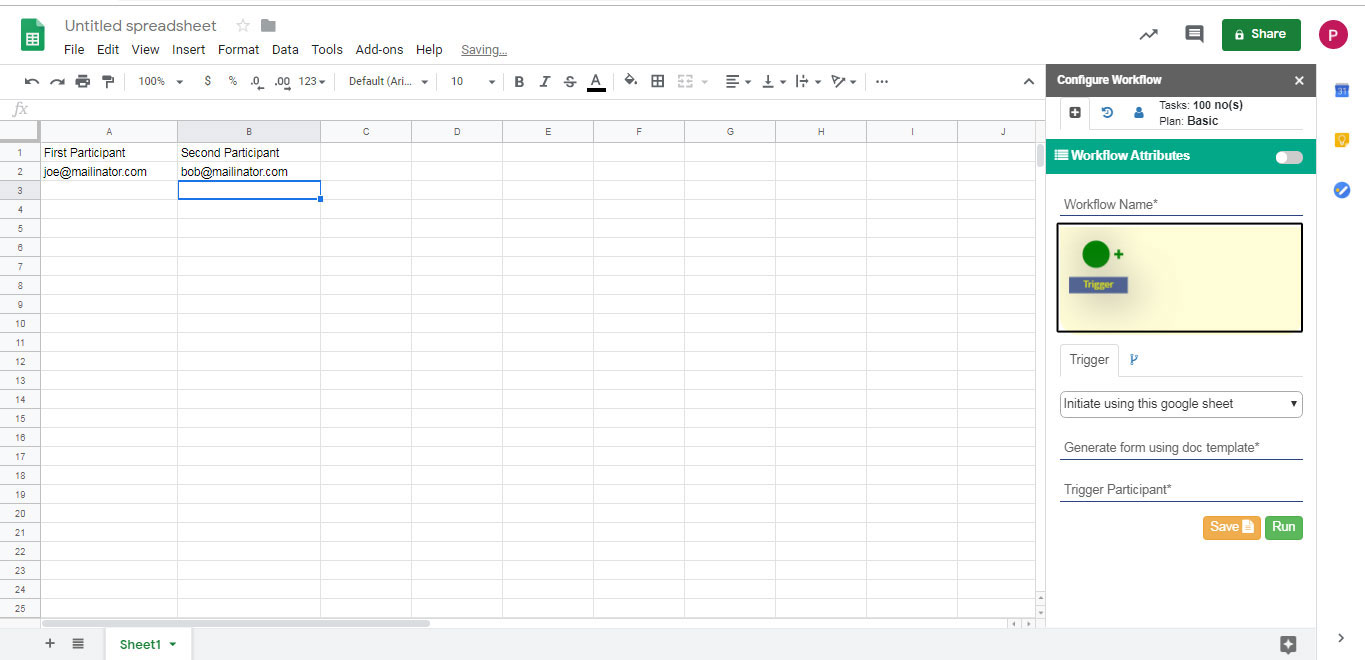
You can view three horizontal tabs on the top i.e. "plus" icon represents add workflow attributes, "timer" icon represents workflow history and "user" icon represents user settings.
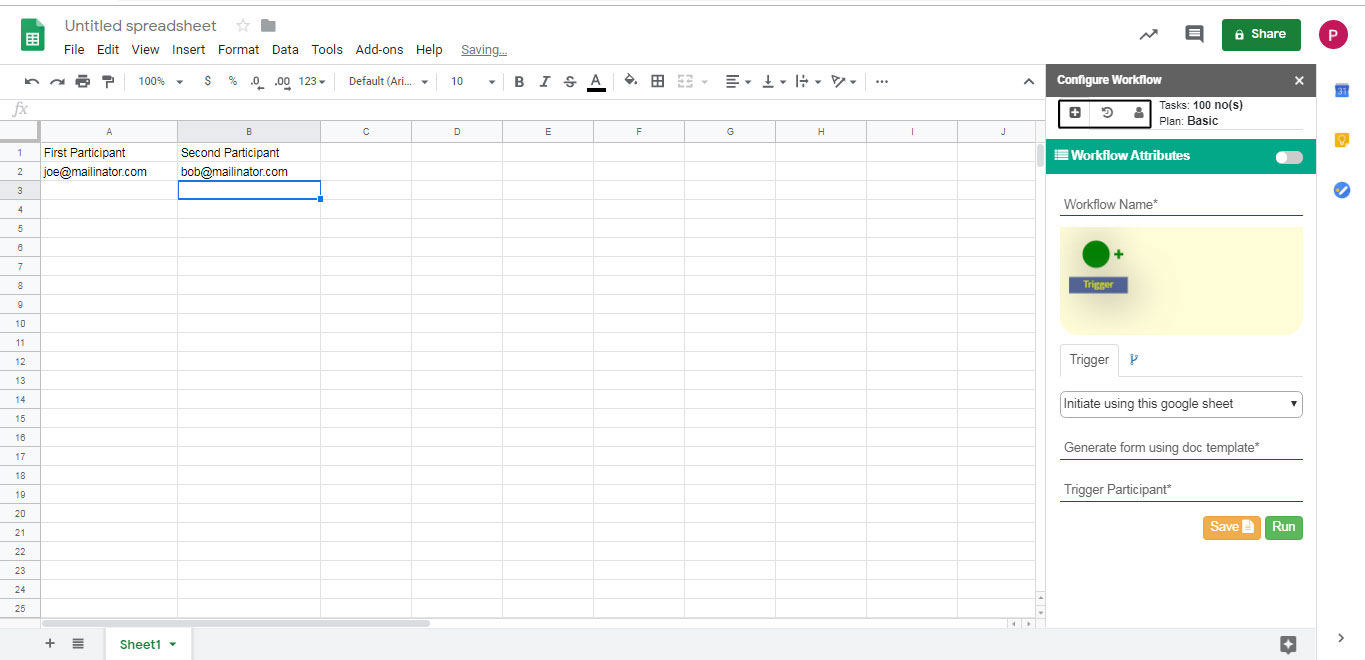
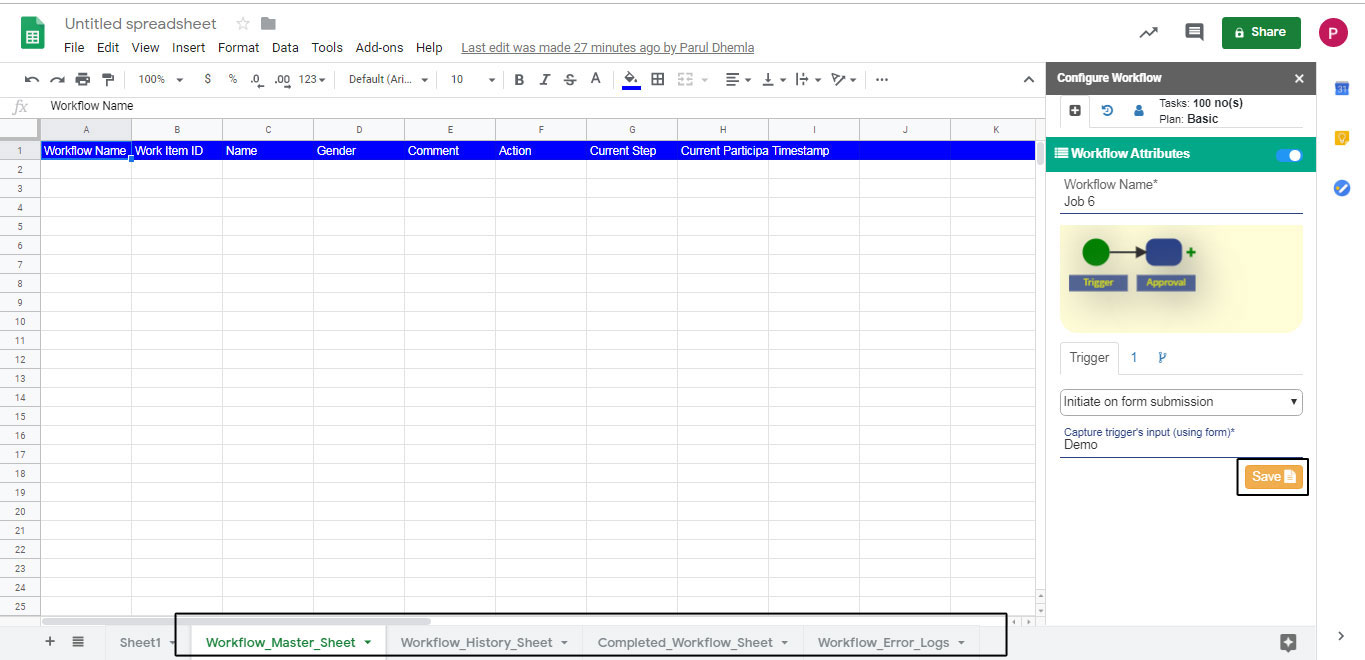
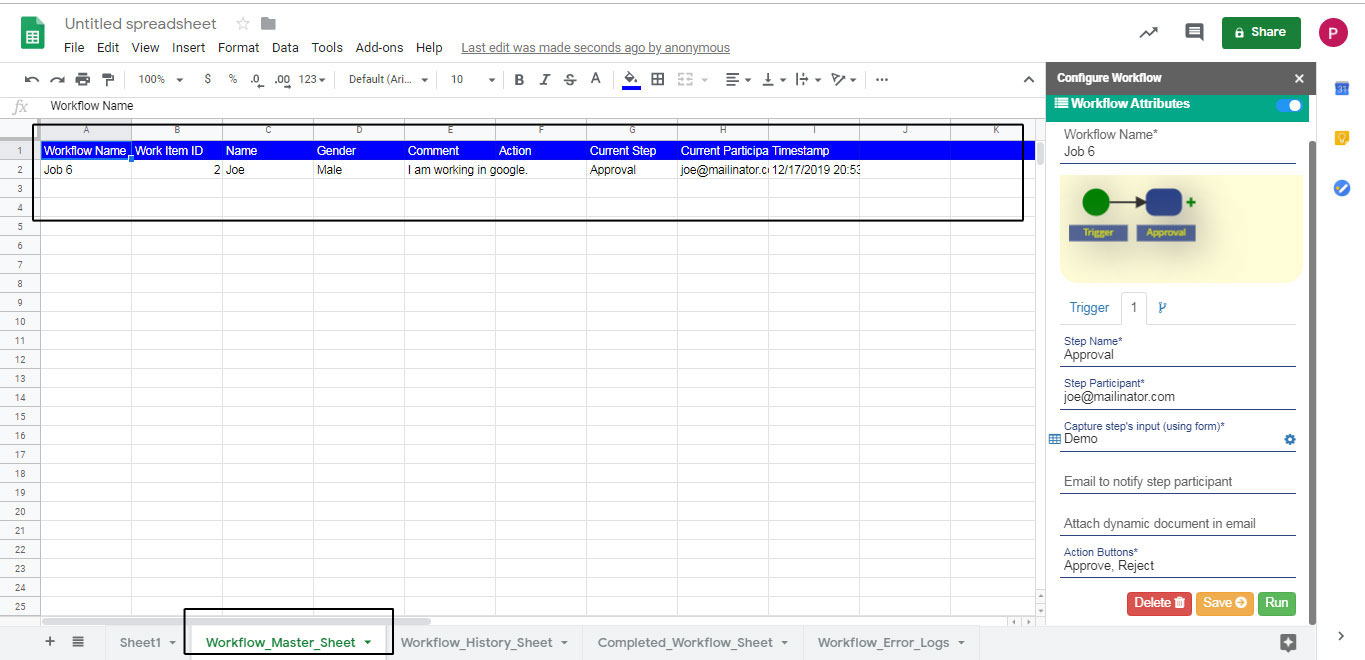
You can add workflow attributes by entering workflow related details like Workflow Name, Workflow Process, when to Trigger, how to trigger and its related information.
In Workflow Name you have to enter the name which you want to give to your workflow.
In Workflow Process you can add steps of the workflow and their respective details.
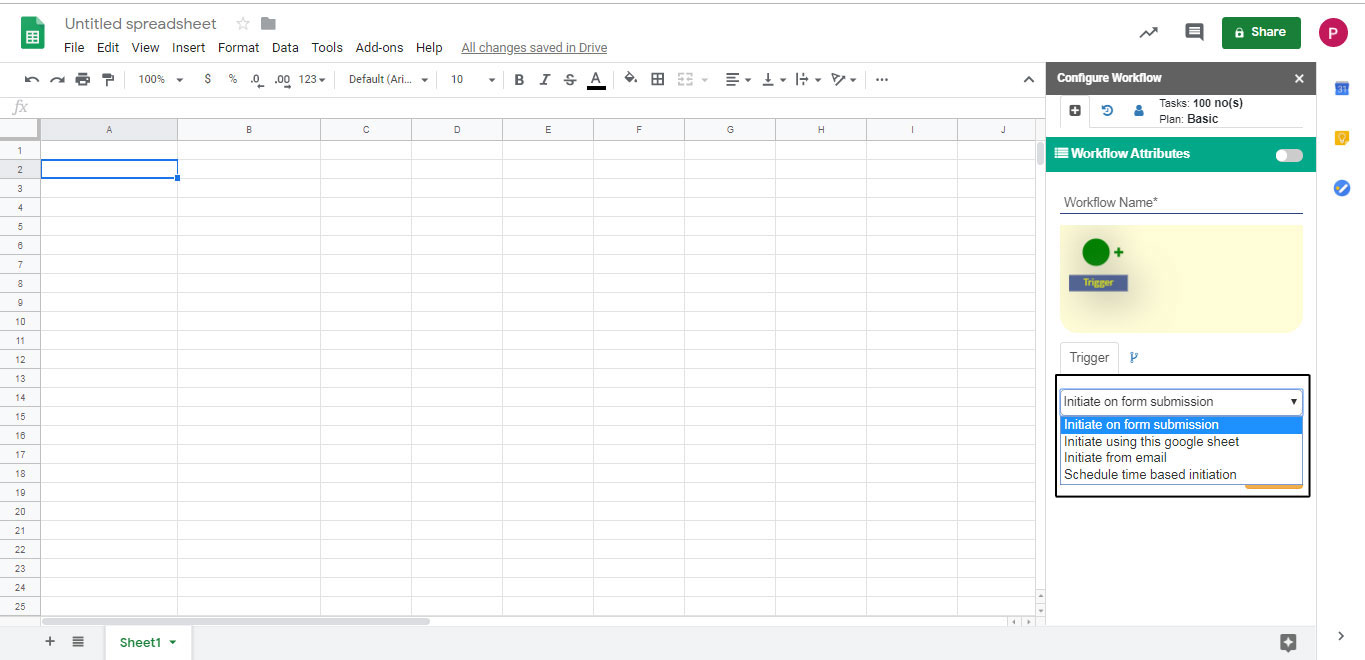
There are again two horizontal tabs i.e. trigger and workflow routing icon. In trigger, you can fill the trigger related details (explained below) and in next tab, you can find new route condition.
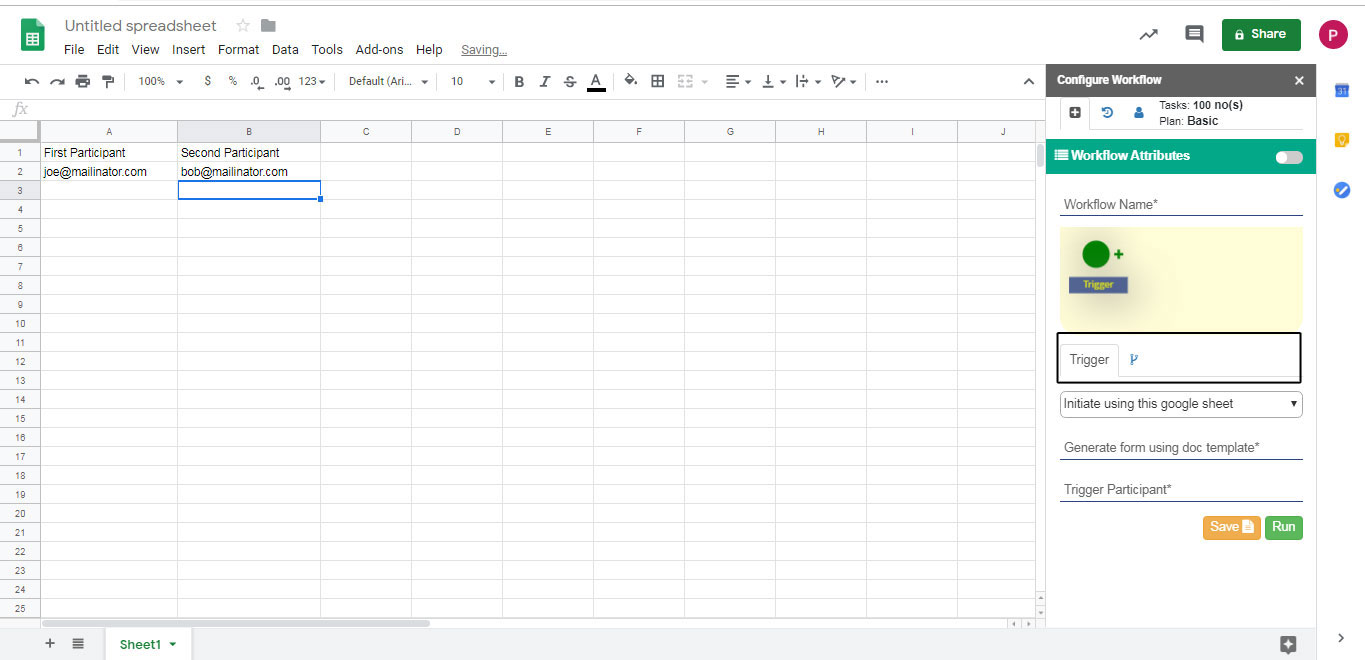
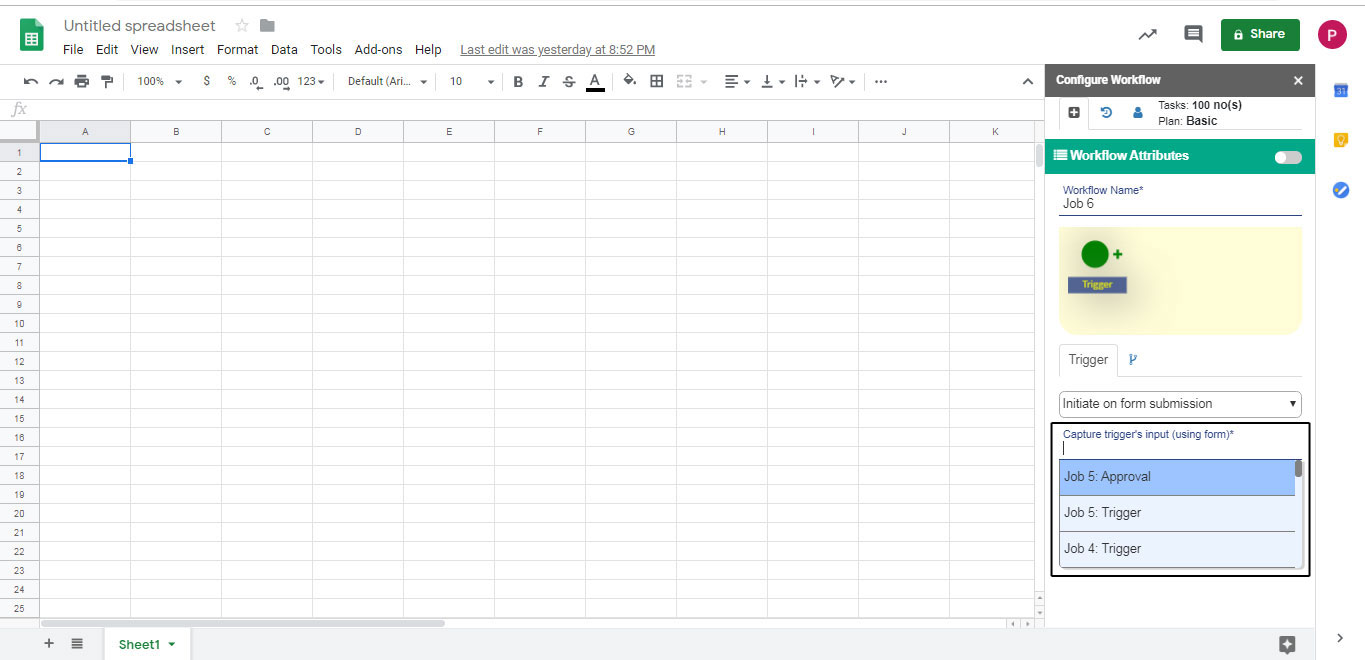
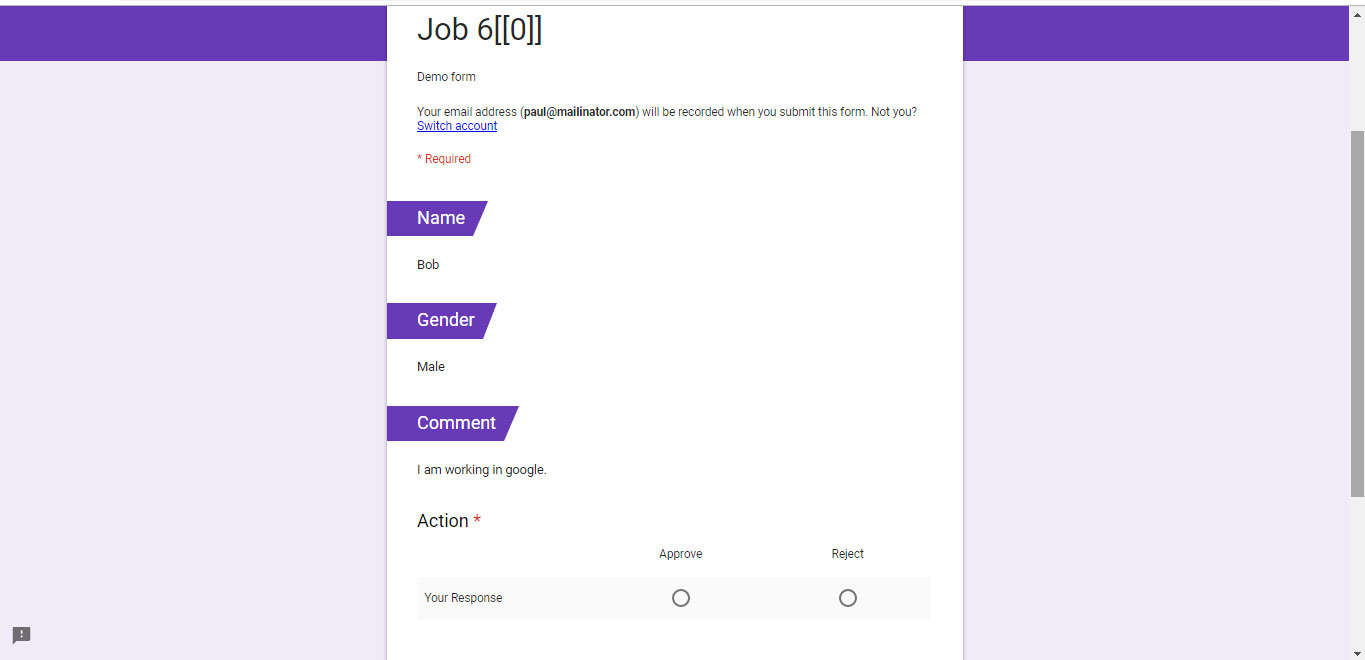
In trigger, you can select trigger - "Initiate on Form Submission".
In "Capture Trigger's input (using form)", you can select the form name of the link you sent to participants.
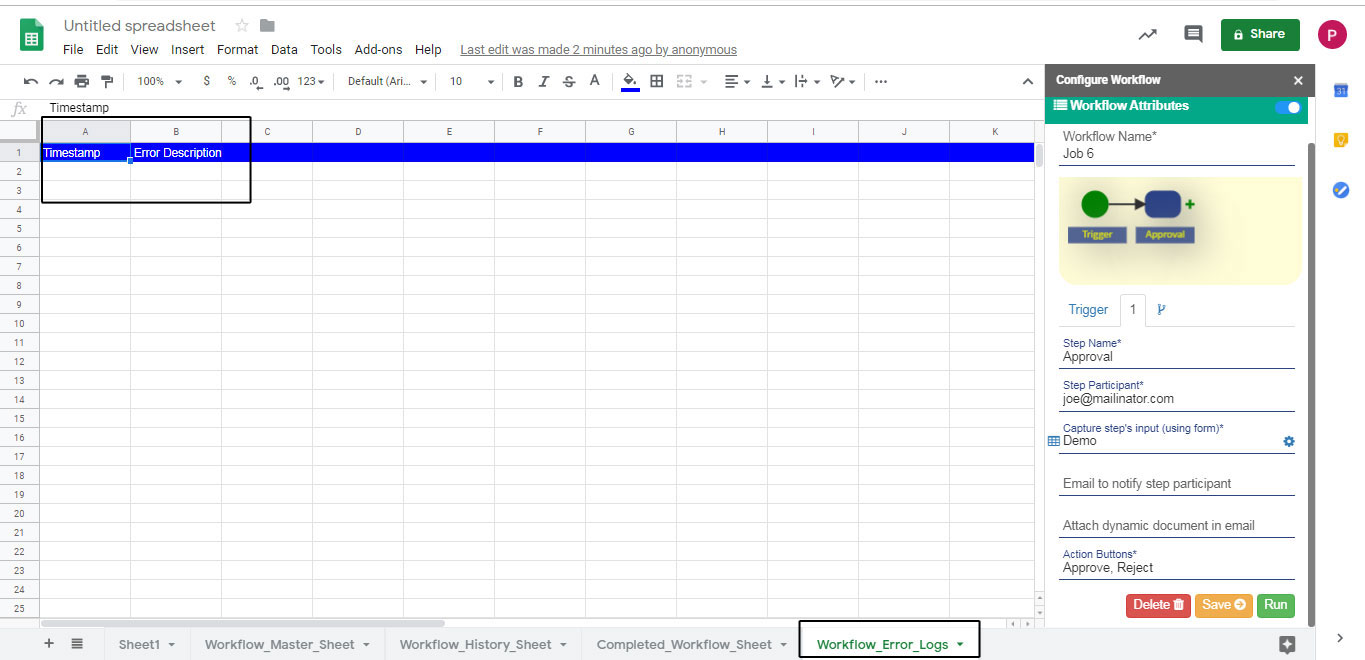
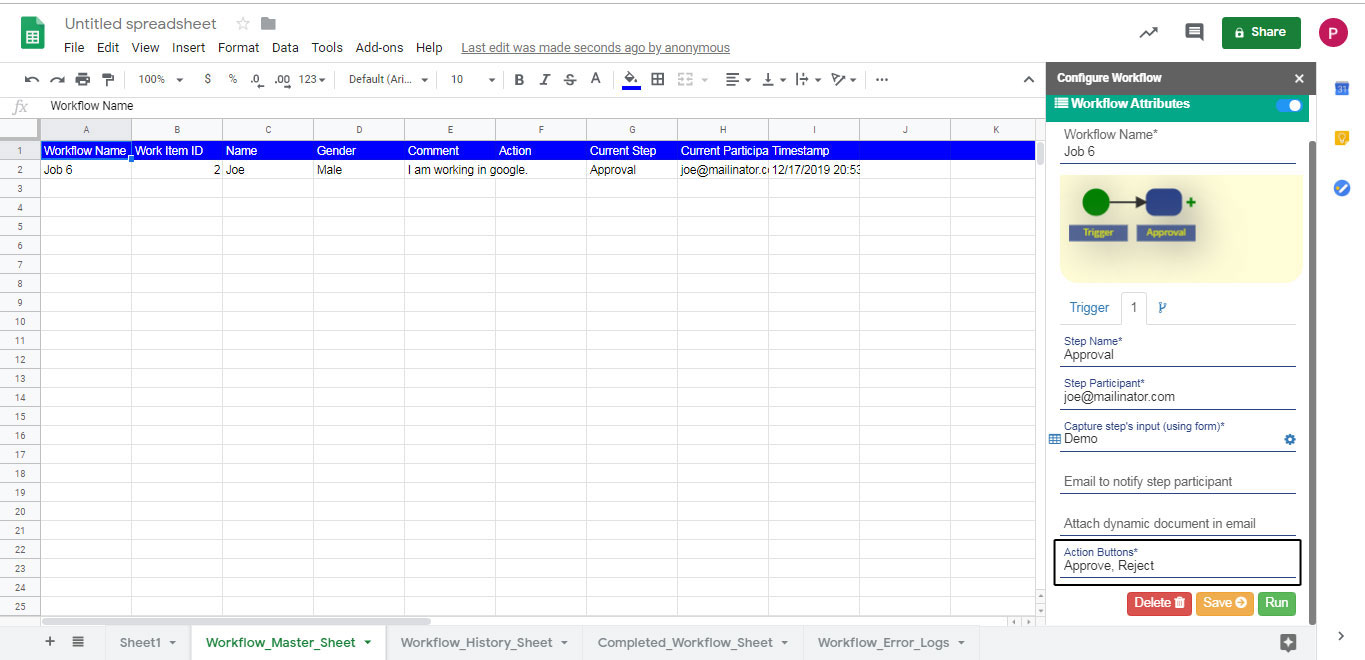
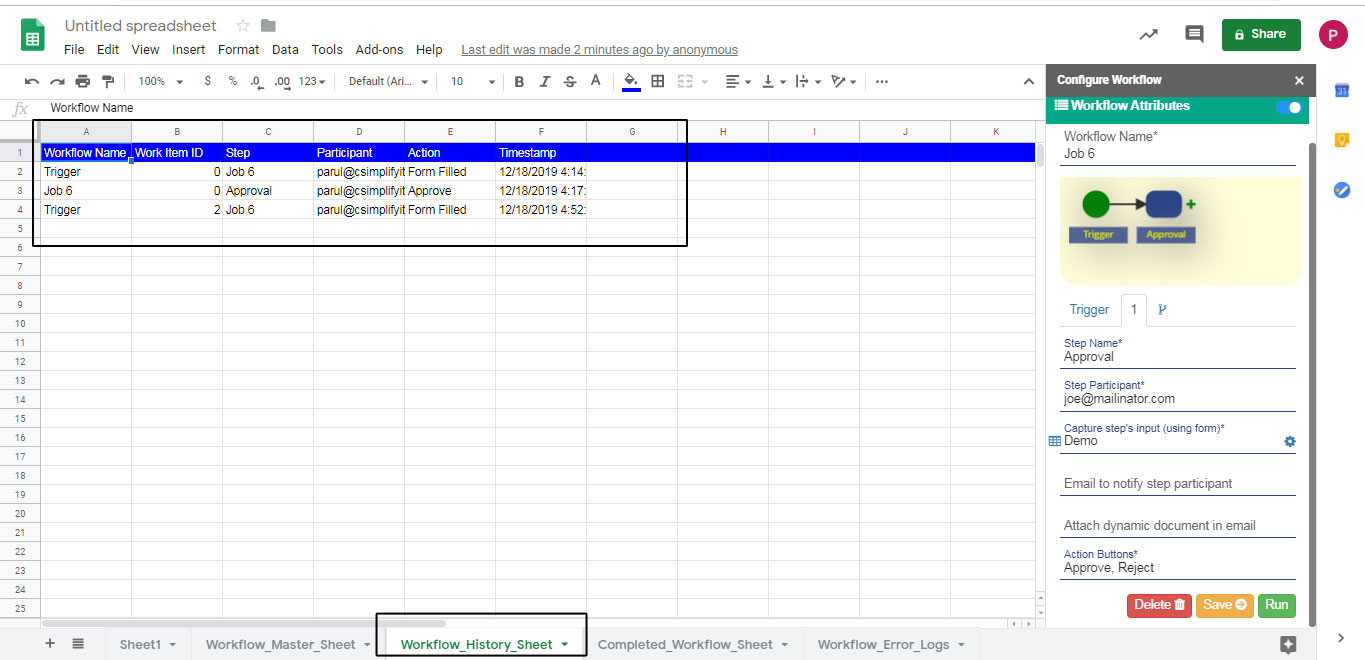
Click on Save button to save the workflow and and creates 4 sheets i.e. Workflow_Master_Sheet, Workflow_History_Sheet, Completed_Workflow_Sheet and Workflow_Error_Logs.
You can click on plus icon to add new step in the workflow.

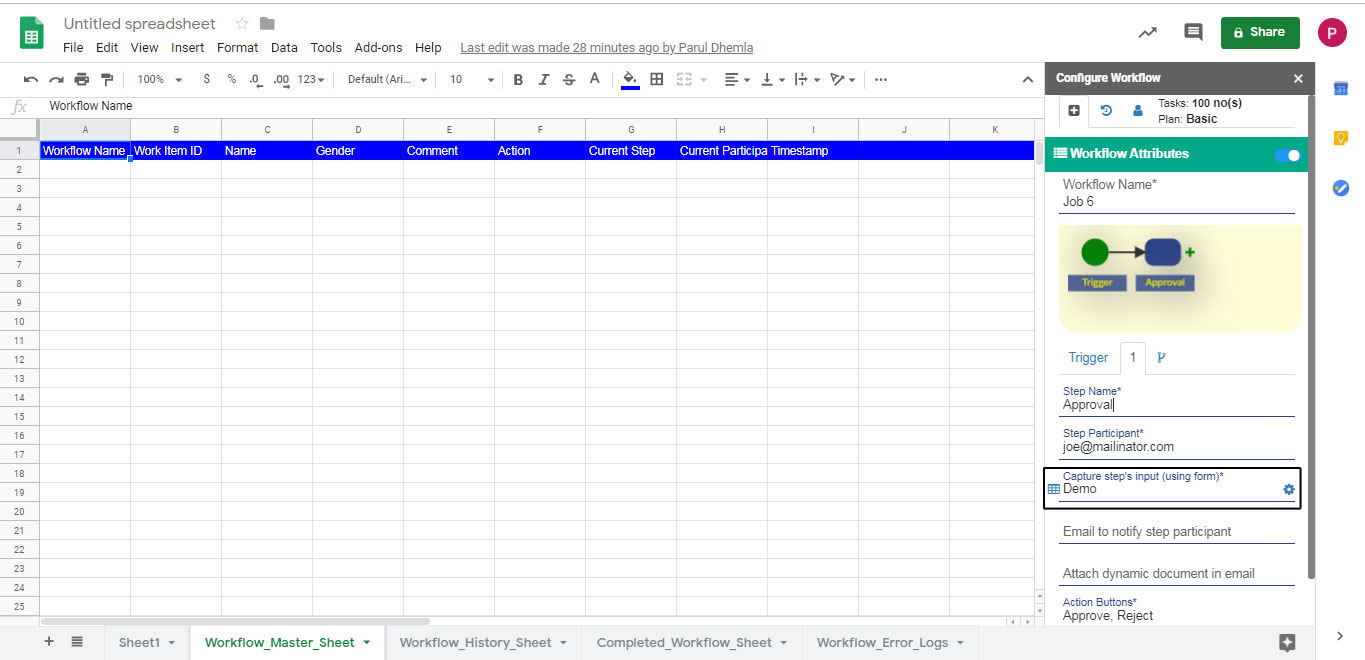
Then, you have to add its details like Step Name, Step Participant, Capture Step's Input, Email to Notify Step Participant, Attach Dynamic Document in Email, Action Buttons.
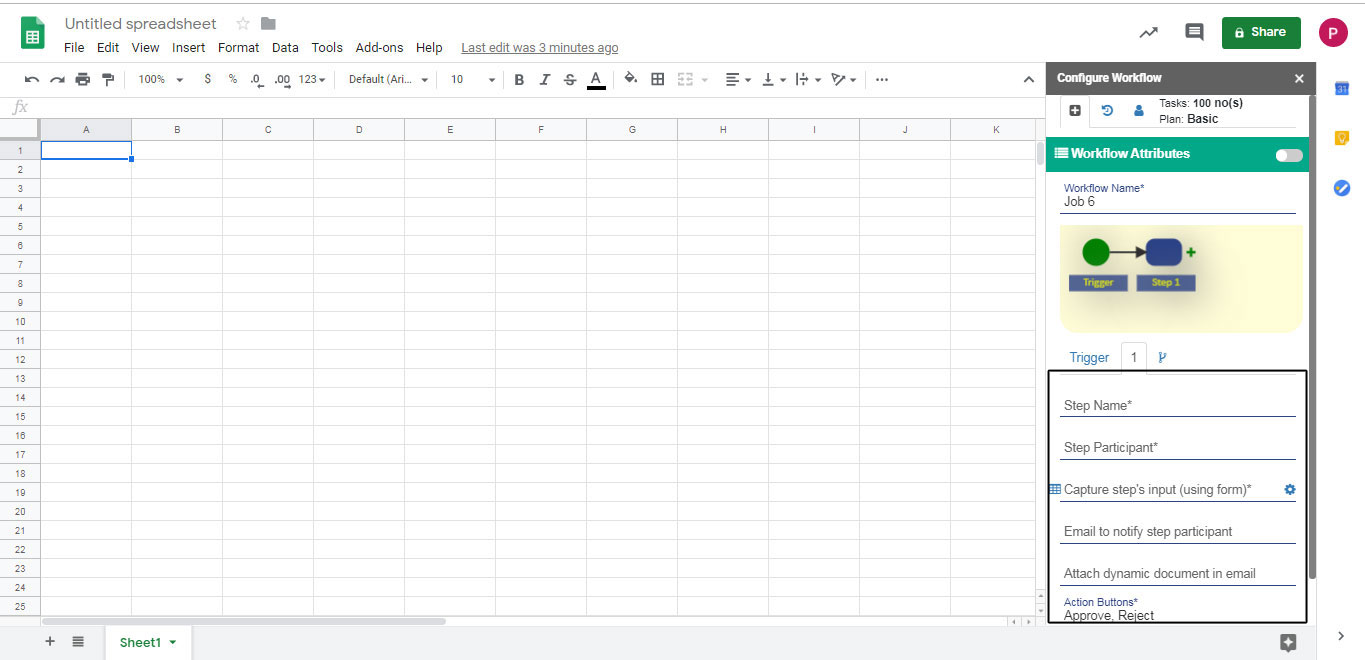
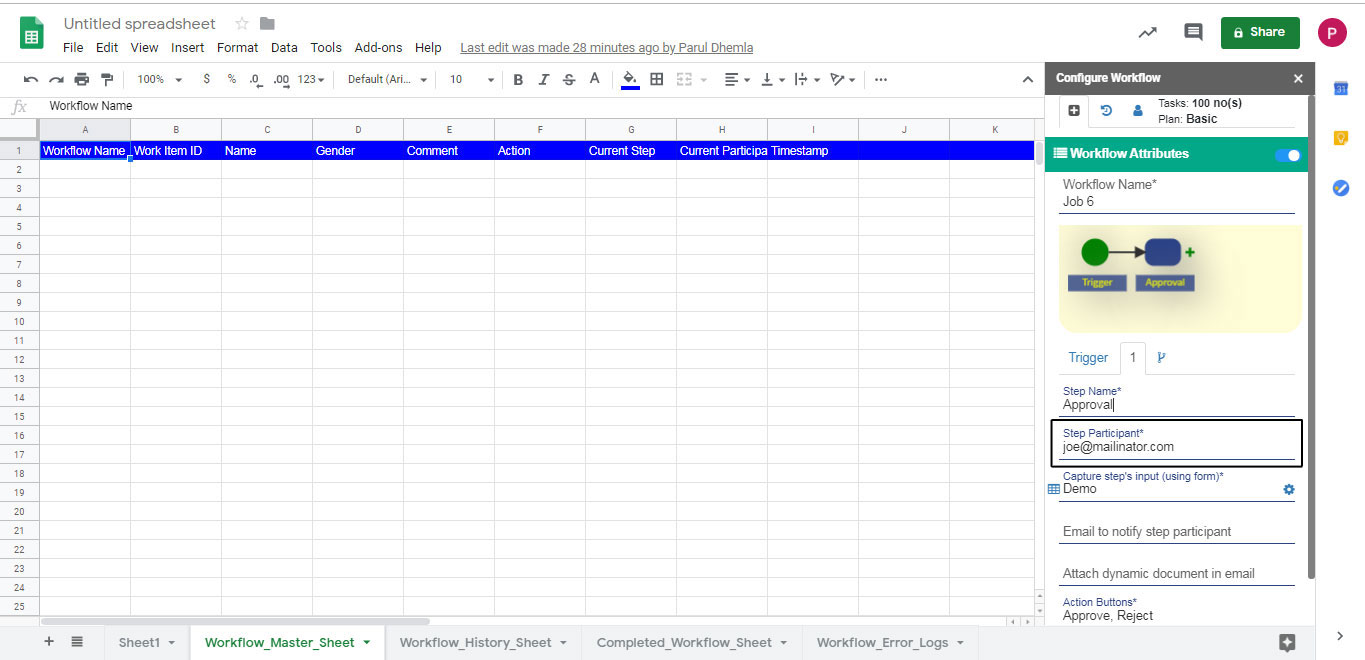
In Step Name, mention the name which you want to give to step. For example, you set name to "Approval" because you want somebody to approve your form.
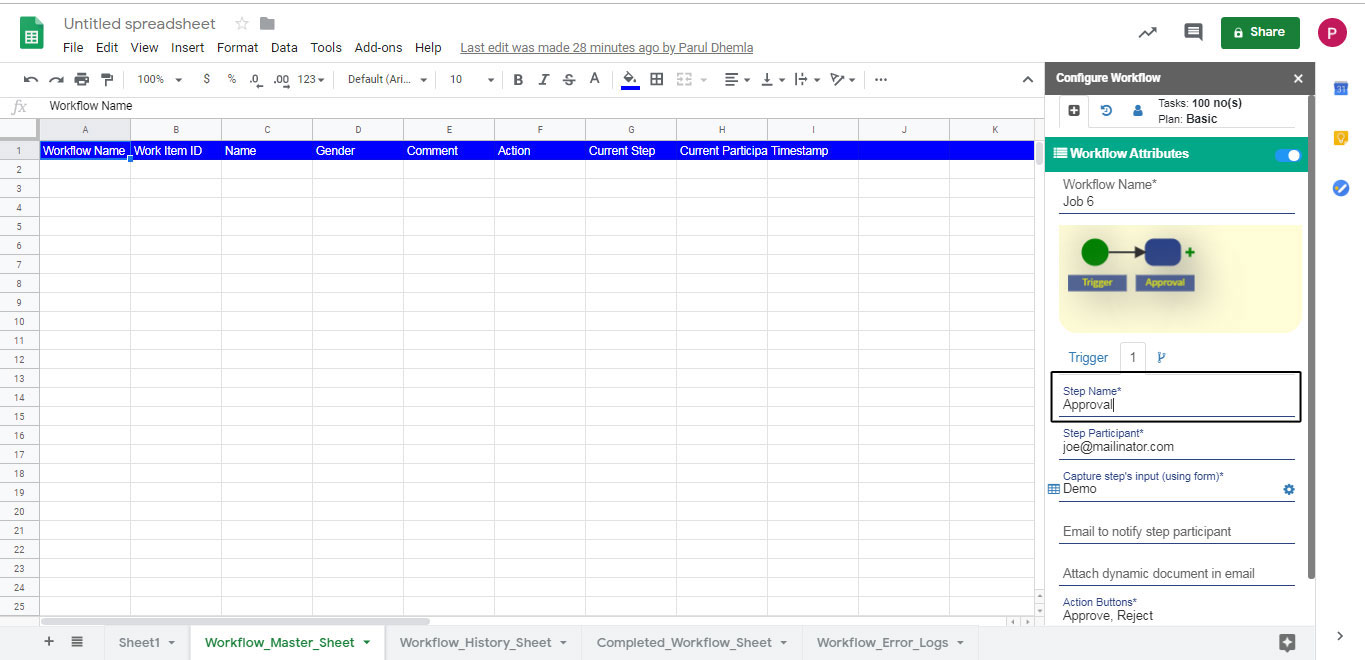
In Step Participant, select the column name from your sheet which contains the email id of step participants. For example, in this you have to mention the email of the participant from whom you want the approval for the form.
In Capture Step's Input, select the form which will sent to step participant.
In Email to Notify Step Participant, you can send an email to any other step particpant to notify about this step.

In Attach Dynamic Document in Email, you can attach the document which is present in your google docs™ to send it along with the form for knowledge.

In Action Buttons, you can select buttons for the form for step participant depends on the actions you want participant to perform. For example, "Approve", "Reject", "Hold".
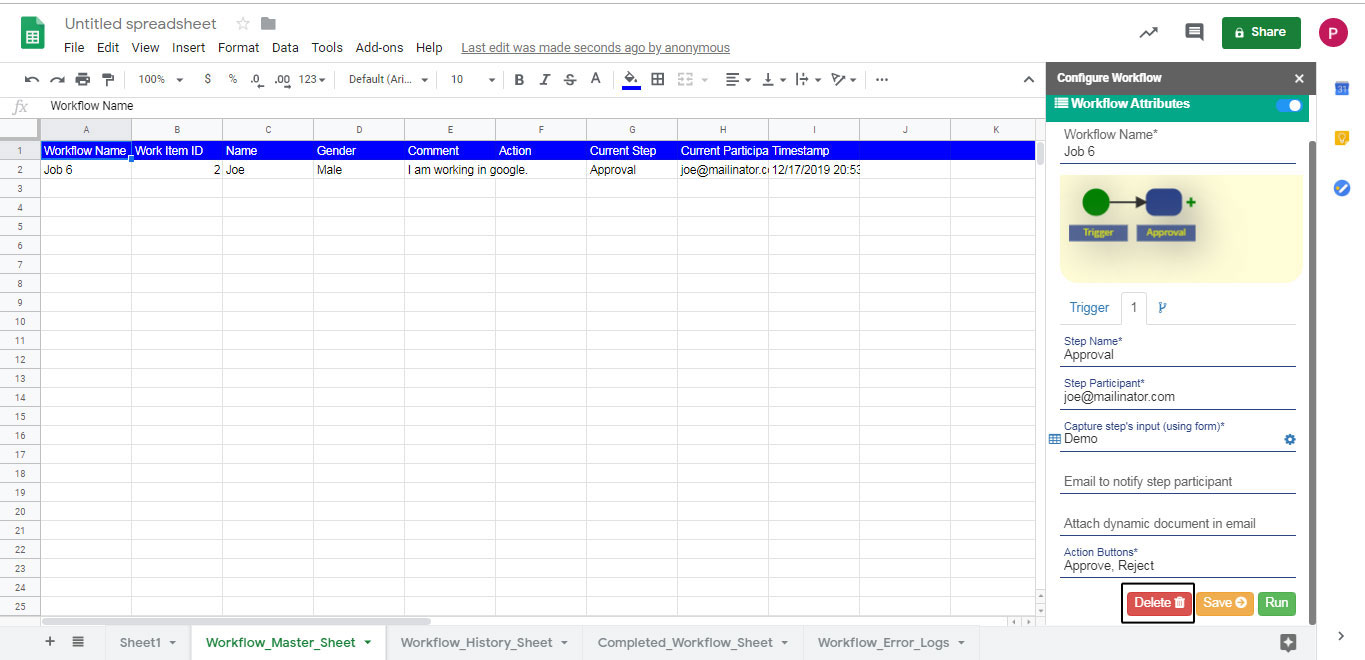
Click on Delete, to delete to the step.
Click on Save, to save to details.

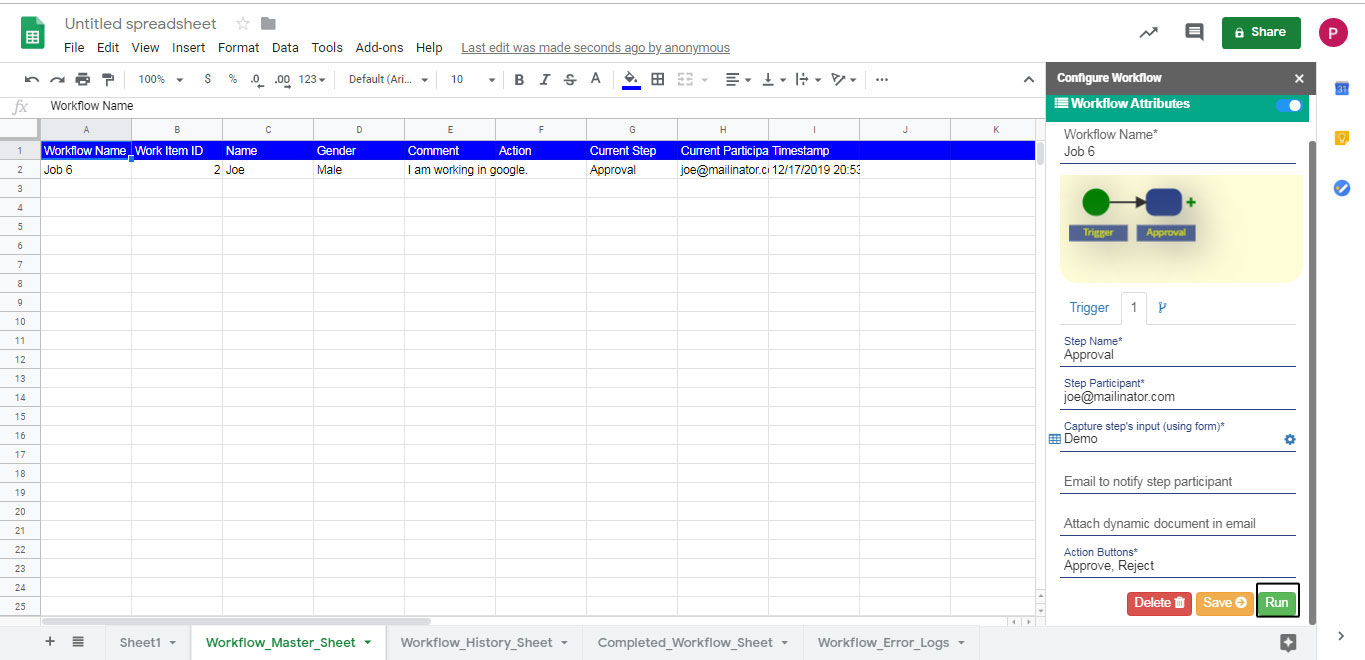
Click on Run to run the workflow.
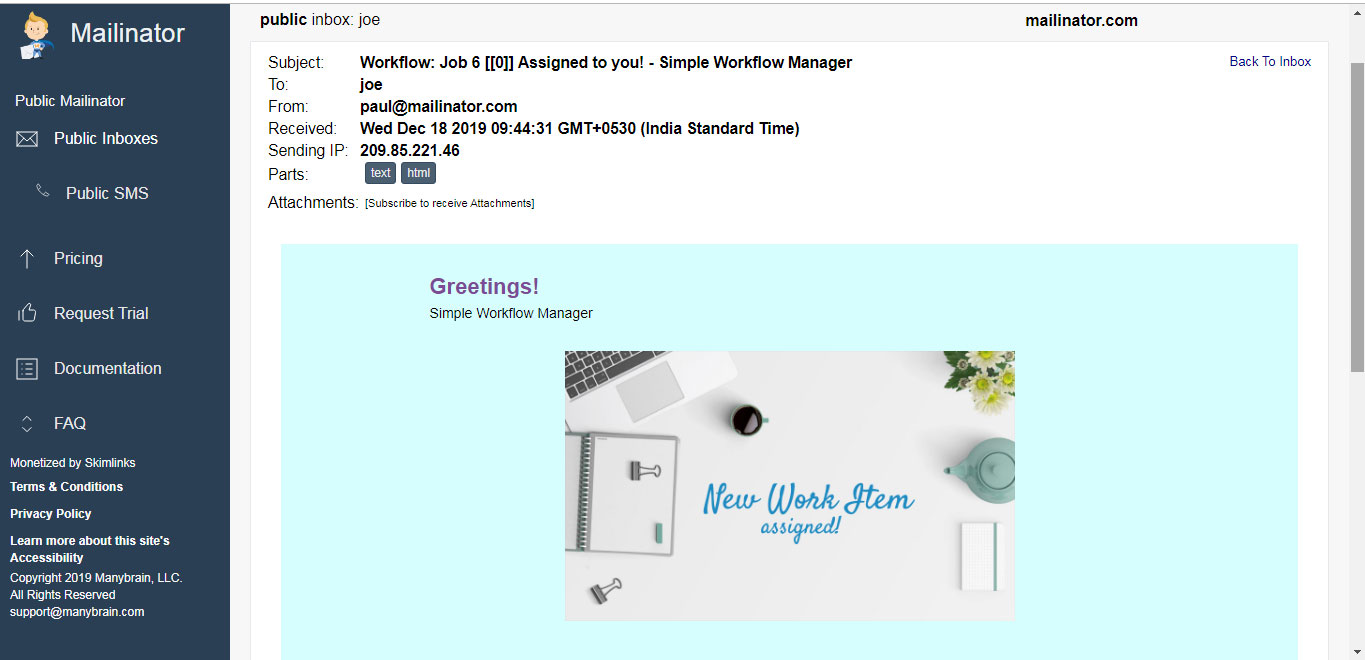
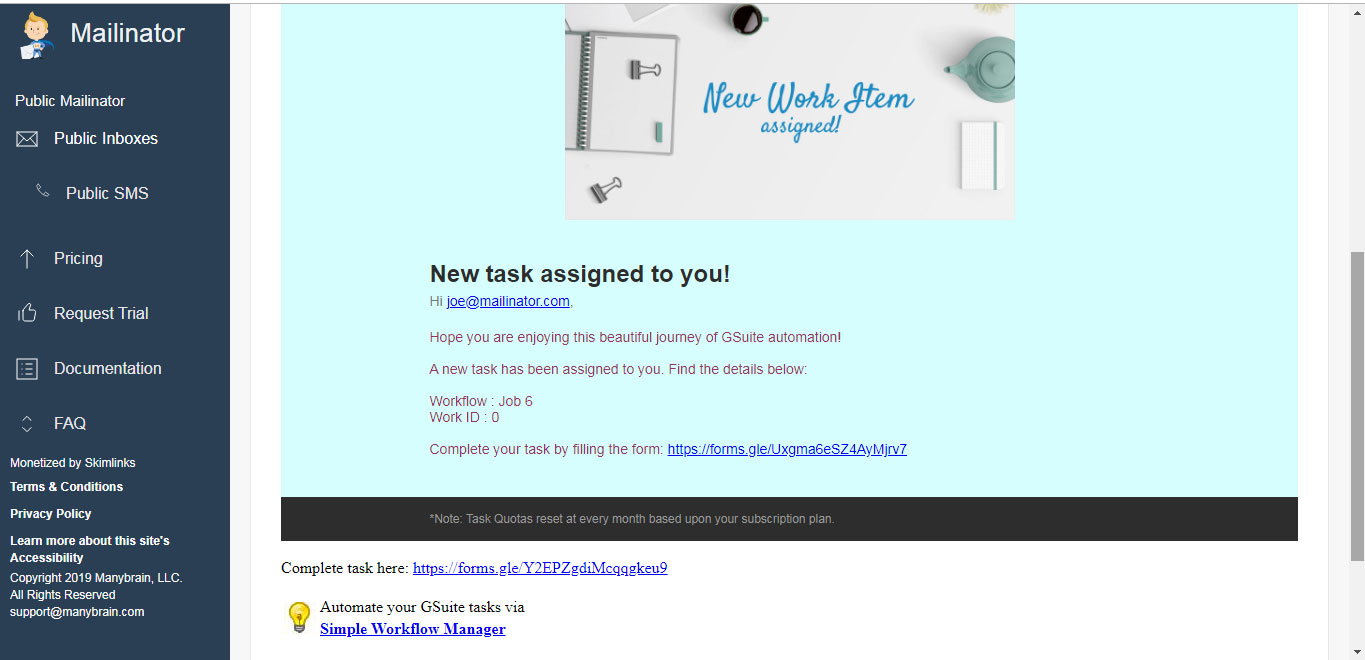
When the participant (whom we sent the form link manually using email) fills the form it will send the response to the step participant for further process. By the time, the entry (response) has been filled in the Workflow_Master_Sheet and Workflow_History_Sheet.
Then, step participant(s) should fill the form accordingly that helps in completing the workflow. You can find the data has been filled in the sheets automatically.
Four sheets created are as follows:

1. "Workflow_Master_Sheet" which gives you all the information in one sheet.
2. "Workflow_History_Sheet" which provides you the history of the workflow like Workflow Name, Work Item ID, Participant, Action, Time Stamp.
3. "Completed_Workflow_Sheet" is the sheet where all the completed work items are stored.

4. "Workflow_Error_Logs" is the sheet where you find the errors come in between the workflow.